Easy No-Bake Oreo Balls Recipe: The Ultimate Guide to Irresistible Truffles
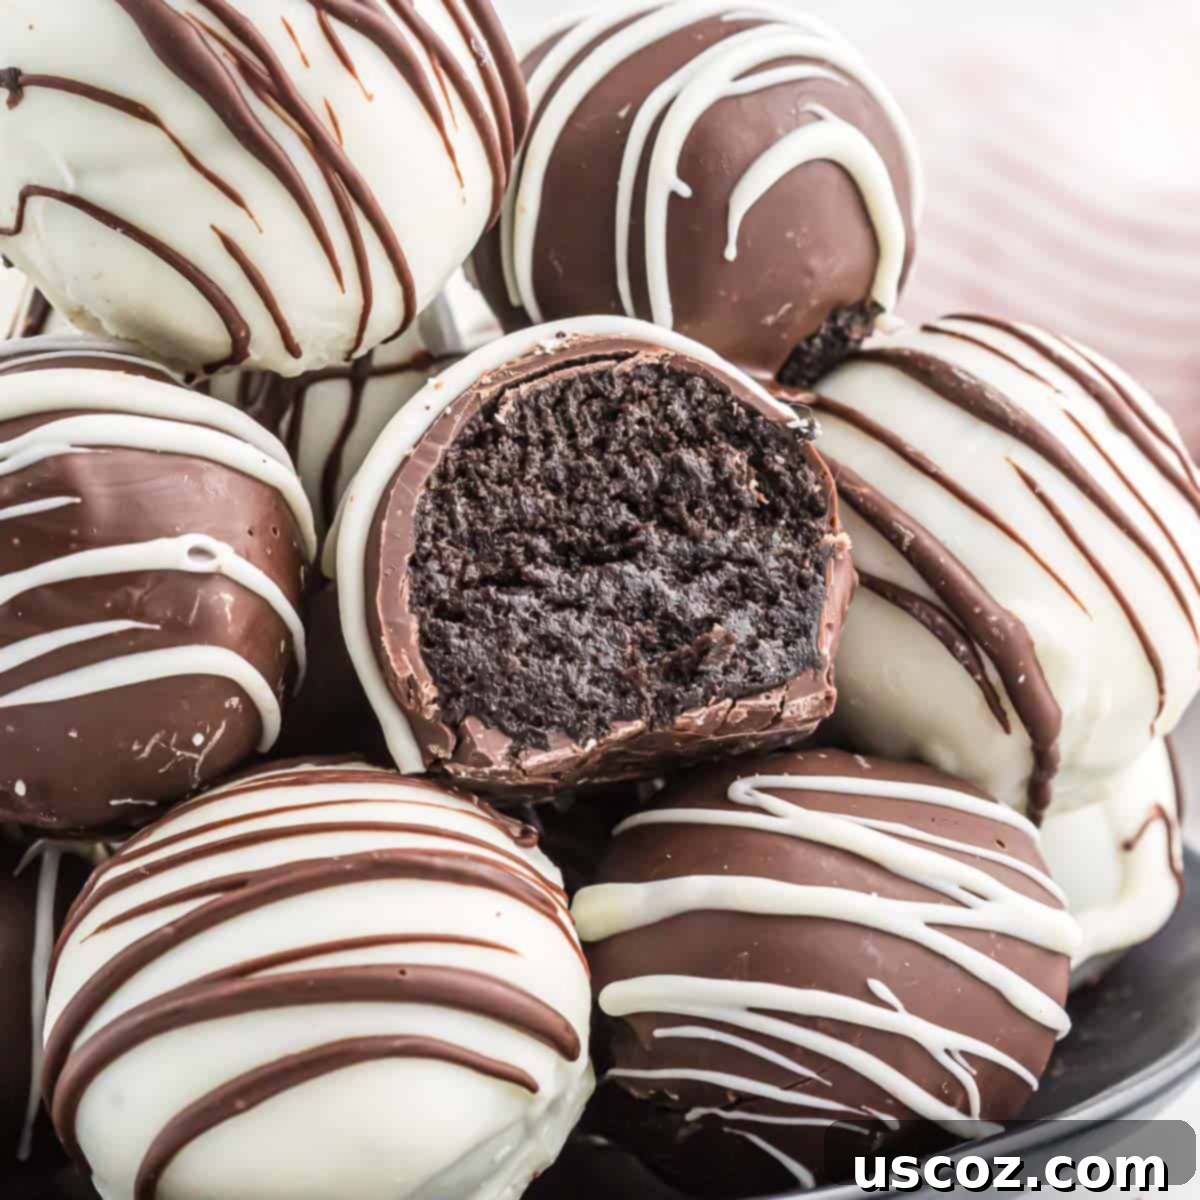
These classic Oreo balls are a timeless favorite no-bake dessert, perfect for any occasion and incredibly simple to make, requiring just a few ingredients and no oven!
Why Everyone Loves Oreo Balls (Oreo Truffles)
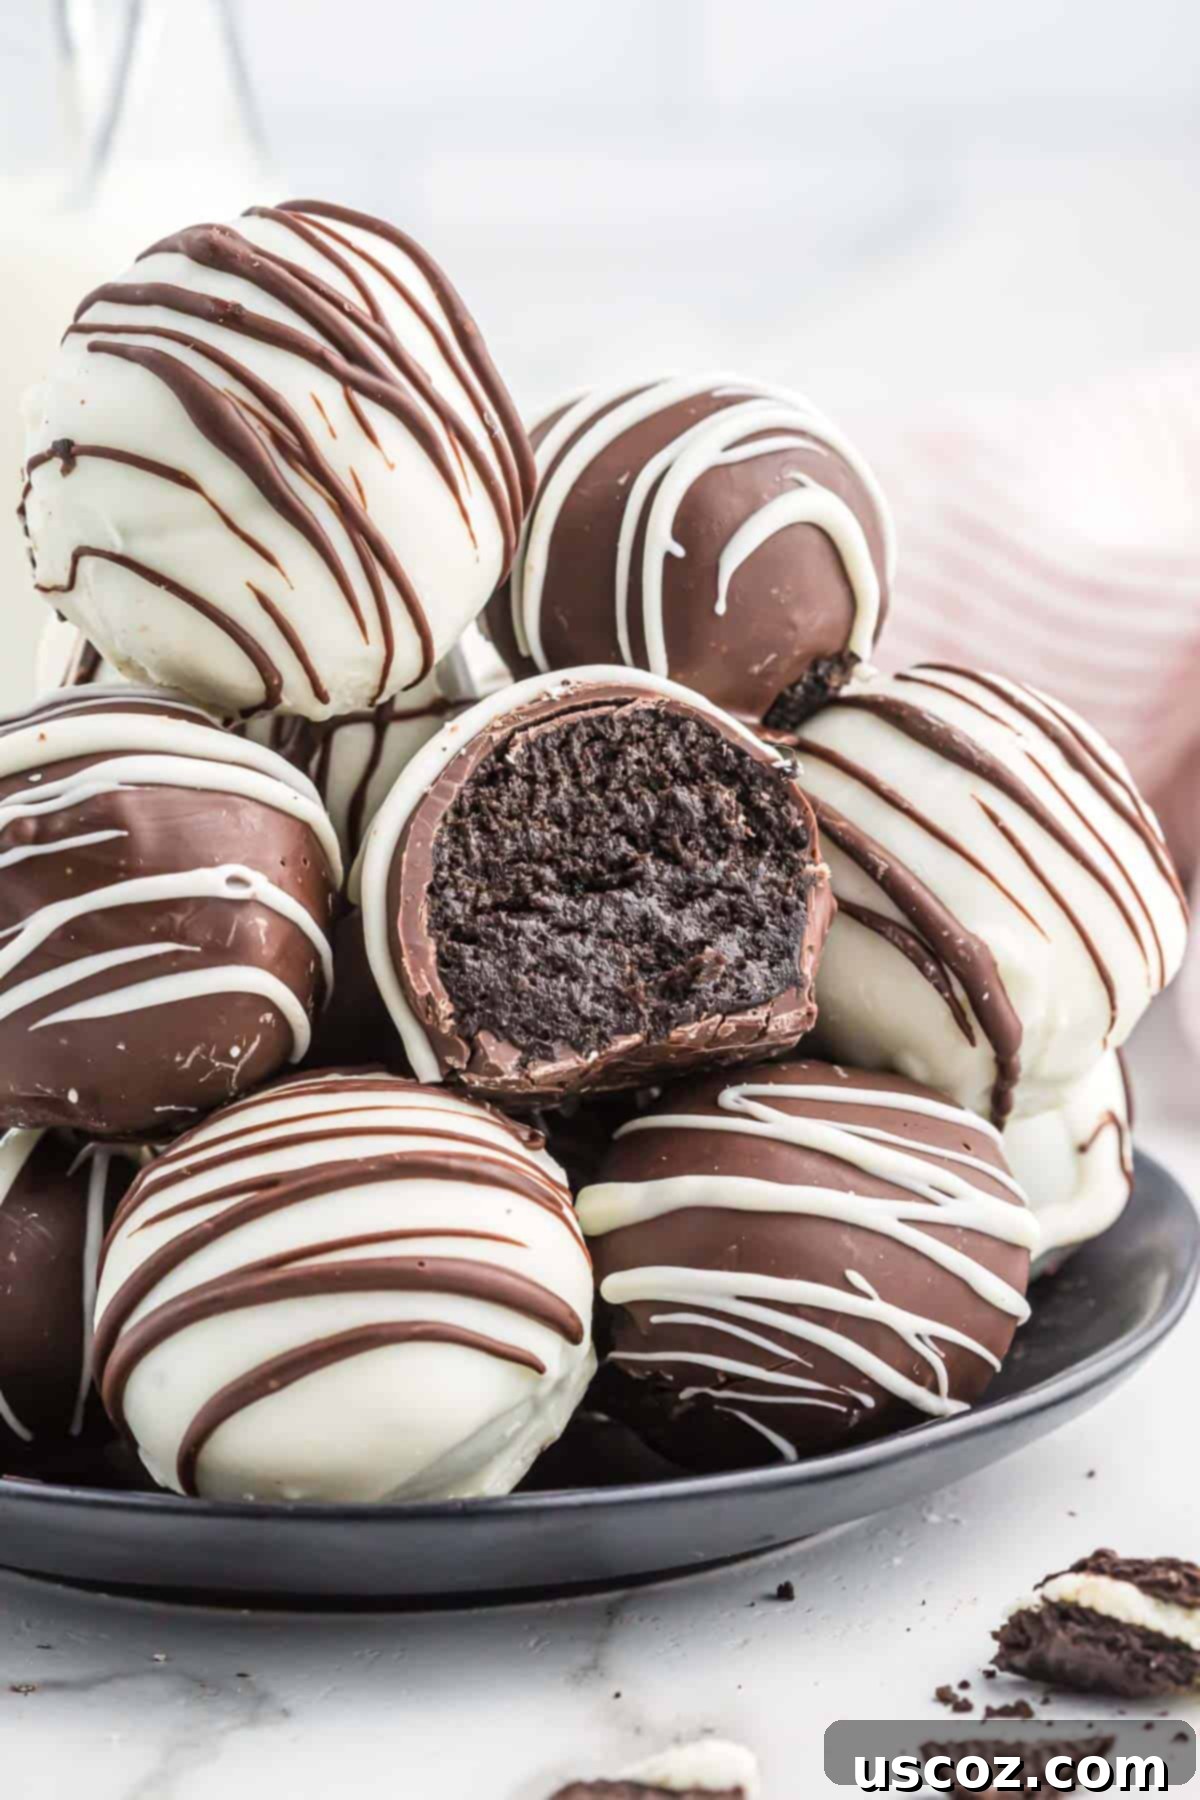
Oreo balls, often affectionately referred to as Oreo truffles, have carved out a special place in the hearts of dessert lovers worldwide. Their enduring popularity isn’t just a coincidence; it’s a testament to their utterly delicious flavor, satisfying texture, and remarkable ease of preparation. Imagine the iconic taste of Oreo cookies — that rich, chocolatey crunch combined with sweet, creamy filling — transformed into a bite-sized, decadent truffle. That’s precisely what you get with these no-bake wonders.
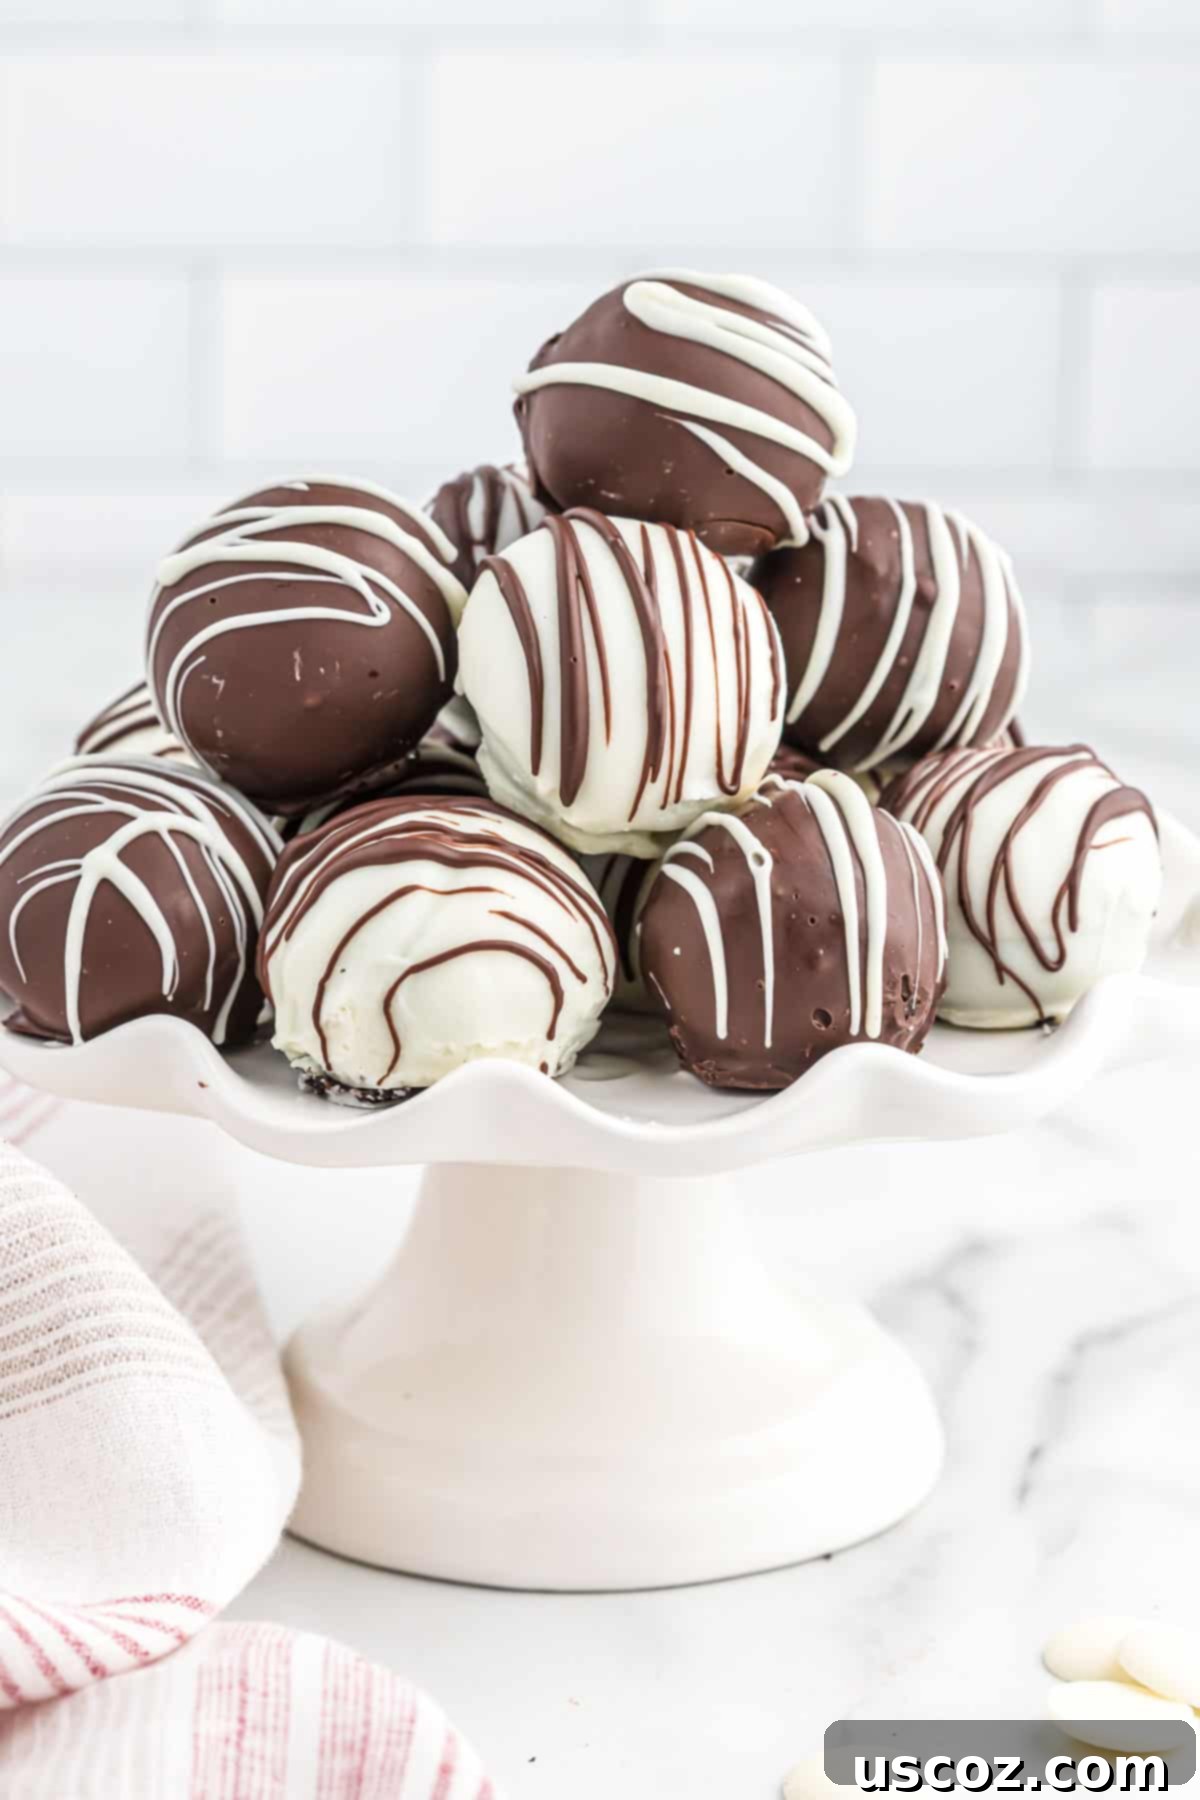
The magic begins with a simple, two-ingredient filling: finely crushed Oreo cookies and softened cream cheese. This dynamic duo blends seamlessly to create a luscious, fudgy base that’s both sweet and slightly tangy. Once rolled into perfect spheres and chilled to perfection, these delectable treats are then dipped in a smooth, melted chocolate coating, which hardens into a delightful shell. The final touch? A decorative drizzle or sprinkle of your choice, allowing for endless customization and flair.
Their no-bake nature makes them an absolute dream for anyone seeking a quick, impressive dessert without the fuss of turning on an oven. Whether you’re a seasoned baker or a kitchen novice, these truffles are virtually foolproof. They are wonderfully versatile for any celebration or casual treat. We adore making festive variations like Halloween Oreo Balls with spooky themes and Christmas Oreo Balls adorned with seasonal sprinkles, bringing joy to every holiday gathering. They are perfect for birthday parties, potlucks, graduations, or simply as a sweet indulgence on a quiet evening.
Essential Ingredients for Perfect No-Bake Oreo Truffles
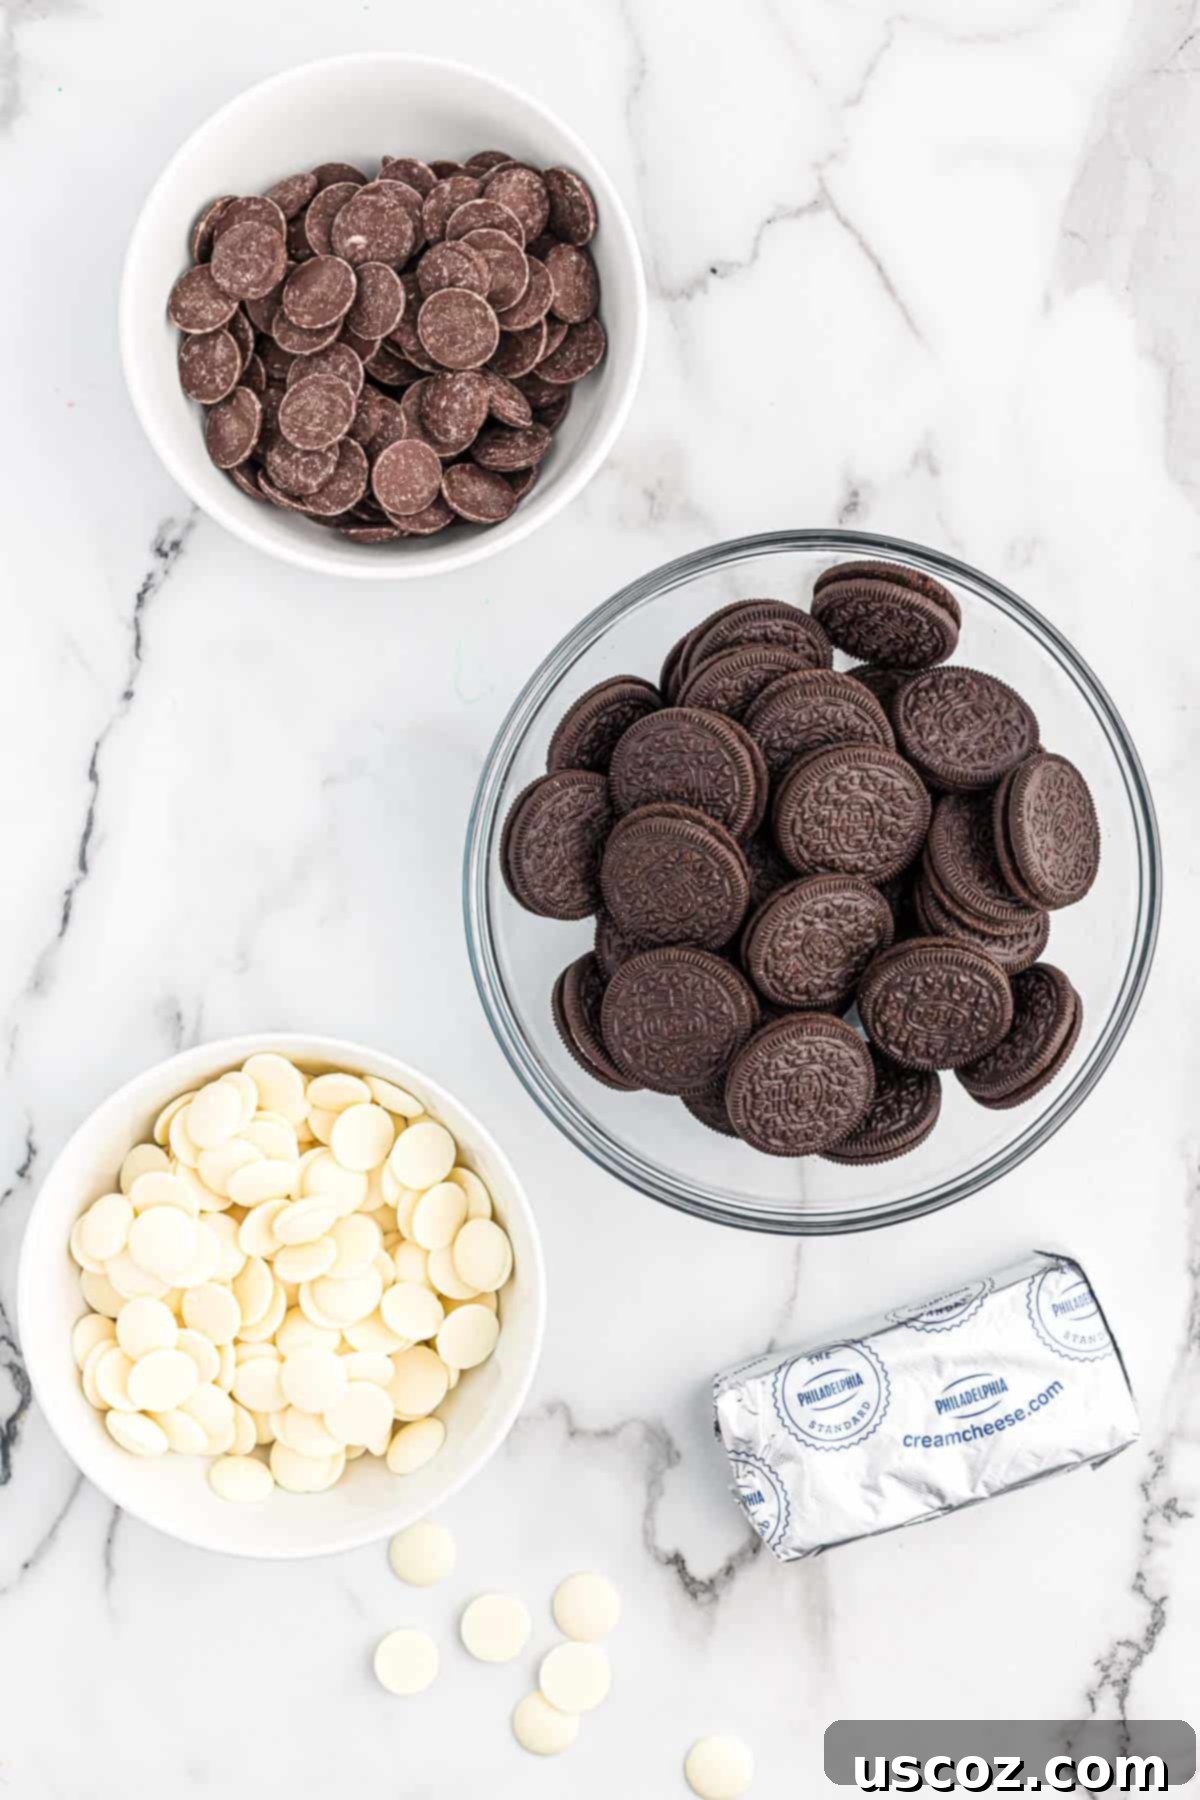
Creating these irresistible no-bake Oreo truffles requires a surprisingly short list of ingredients. Focusing on quality and proper preparation of each component will ensure your truffles are as delicious as they are beautiful. Here’s what you’ll need to get started:
Ingredients Needed
- Oreos: The foundation of our truffles! A standard package of regular Oreo cookies is ideal. Avoid “Double Stuf” or “Thins” unless you’re prepared to adjust the amount of cream cheese, as their cookie-to-cream ratio differs. Using the entire cookie, filling and all, creates the authentic Oreo flavor.
- Cream Cheese: Opt for full-fat cream cheese for the richest, creamiest, and most luxurious texture. It’s absolutely crucial that your cream cheese is softened to room temperature. This is the secret to a smooth, lump-free mixture that blends effortlessly with the crushed Oreos. Cold cream cheese will clump and be difficult to incorporate evenly.
- Dark Chocolate Melting Wafers: High-quality melting wafers, such as Ghirardelli, are recommended for a superior coating. They melt smoothly, provide excellent coverage, and set beautifully with a desirable snap. The rich bitterness of dark chocolate provides a wonderful counterpoint to the sweetness of the Oreo filling.
- White Vanilla Melting Wafers: These are perfect for creating visual contrast and adding a creamy vanilla flavor. They’re excellent for dipping half your truffles or for drizzling elegant patterns over the dark chocolate-coated ones. Like the dark chocolate, high-quality white melting wafers ensure a smooth, professional finish.
Ingredient Sourcing & Tips: While melting wafers offer convenience and a smooth finish, you can also use good quality chocolate chips. If using chips, add about one teaspoon of coconut oil or vegetable shortening per cup of chocolate during melting to thin it slightly and achieve a smoother dipping consistency. Feel free to experiment with different types of chocolate or even colored candy melts to match specific themes or preferences. Always ensure your cream cheese is soft to touch before mixing!
How to Make Delicious Oreo Balls: A Detailed Step-by-Step Guide
Making these no-bake Oreo truffles is an incredibly fun and rewarding process. With just a few simple steps, you’ll be well on your way to creating a batch of these crowd-pleasing desserts. Follow along for perfect results every time:
Step 1: Transform Oreos into Fine Crumbs
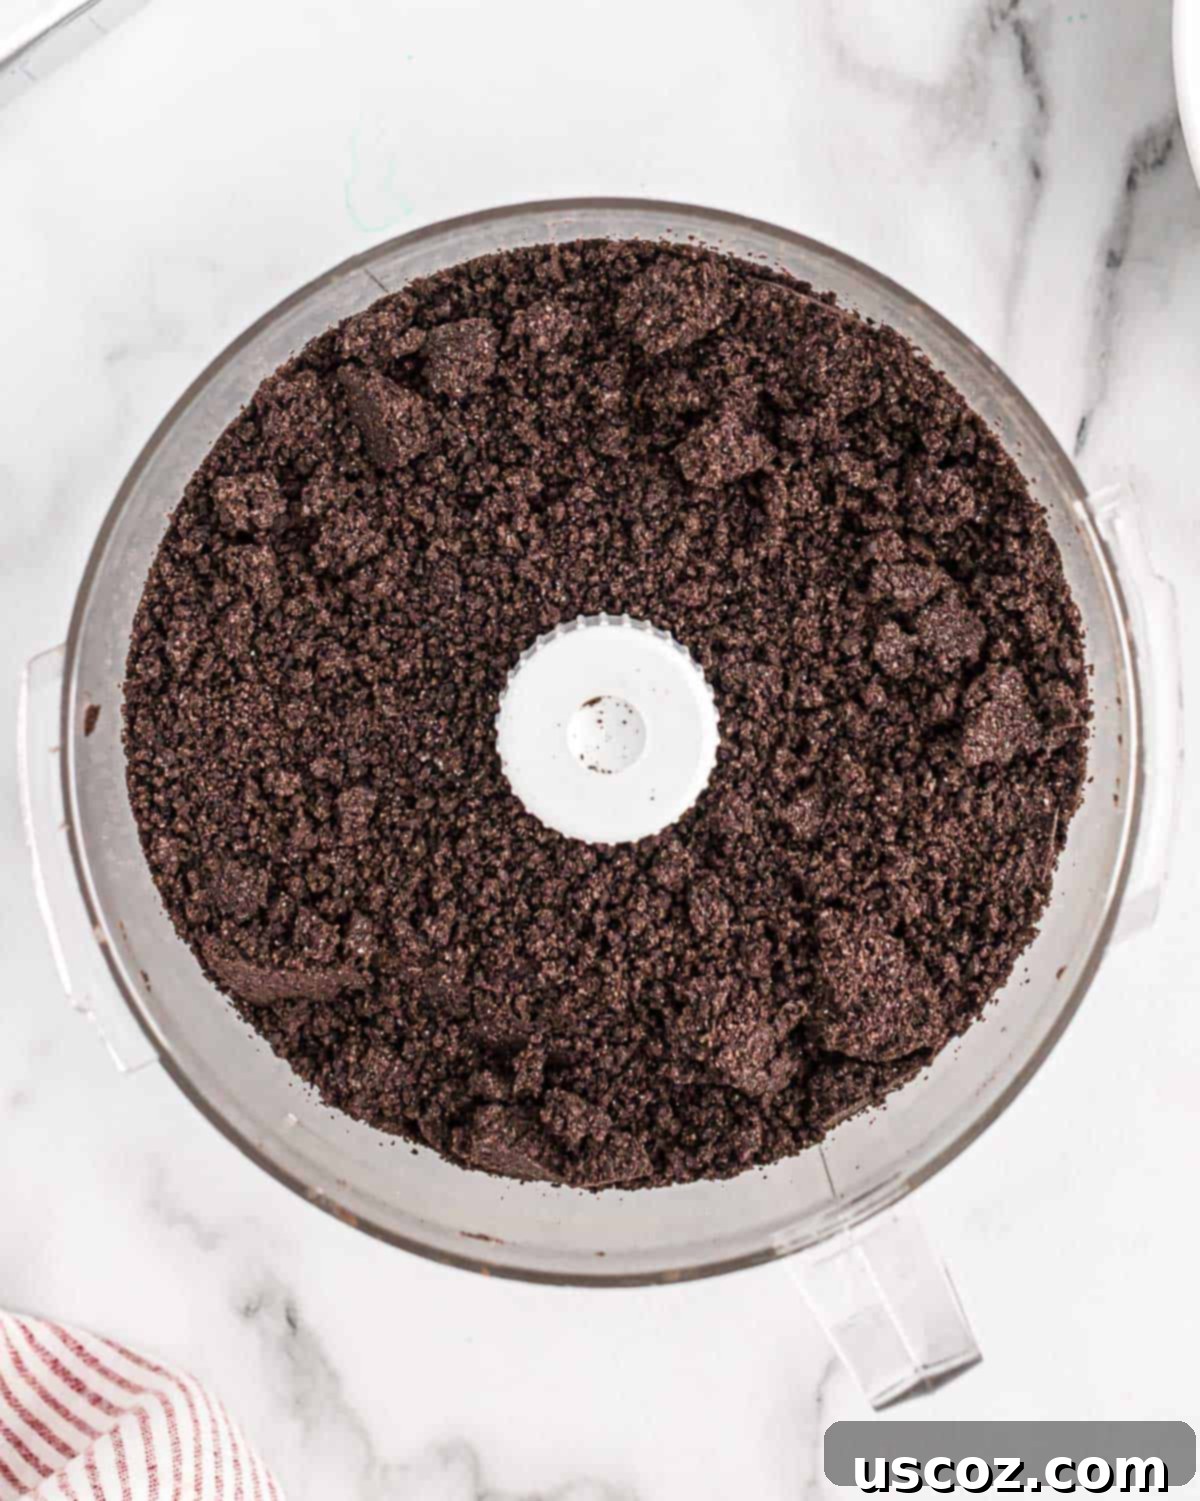
The journey to perfect Oreo balls begins with the cookies themselves. Place the entire package of Oreo cookies, including their creamy filling, into the bowl of a food processor. Process on high until the cookies are broken down into very fine, uniform crumbs. The consistency should resemble wet sand, with no large chunks remaining. This fine texture is essential for achieving a smooth, well-integrated truffle mixture. If you don’t have a food processor, you can use a large, heavy-duty Ziploc bag and a rolling pin. Seal the bag, pressing out as much air as possible, and then roll over the Oreos repeatedly until they turn into fine crumbs. The finer, the better!
Step 2: Combine with Softened Cream Cheese
Once your Oreos are perfectly crumbed, add the softened cream cheese directly to the food processor with the cookie crumbs. Pulse the mixture several times, stopping to scrape down the sides of the bowl with a spatula, until the cream cheese is thoroughly incorporated. Continue pulsing until the mixture comes together and forms a thick, cohesive, and pliable dough-like consistency. It should be uniform in color and texture, with no streaks of cream cheese visible. If your food processor is on the smaller side or you prefer to mix by hand, transfer the Oreo ball mixture to a large mixing bowl and use a sturdy rubber spatula or clean hands to ensure everything is completely combined.
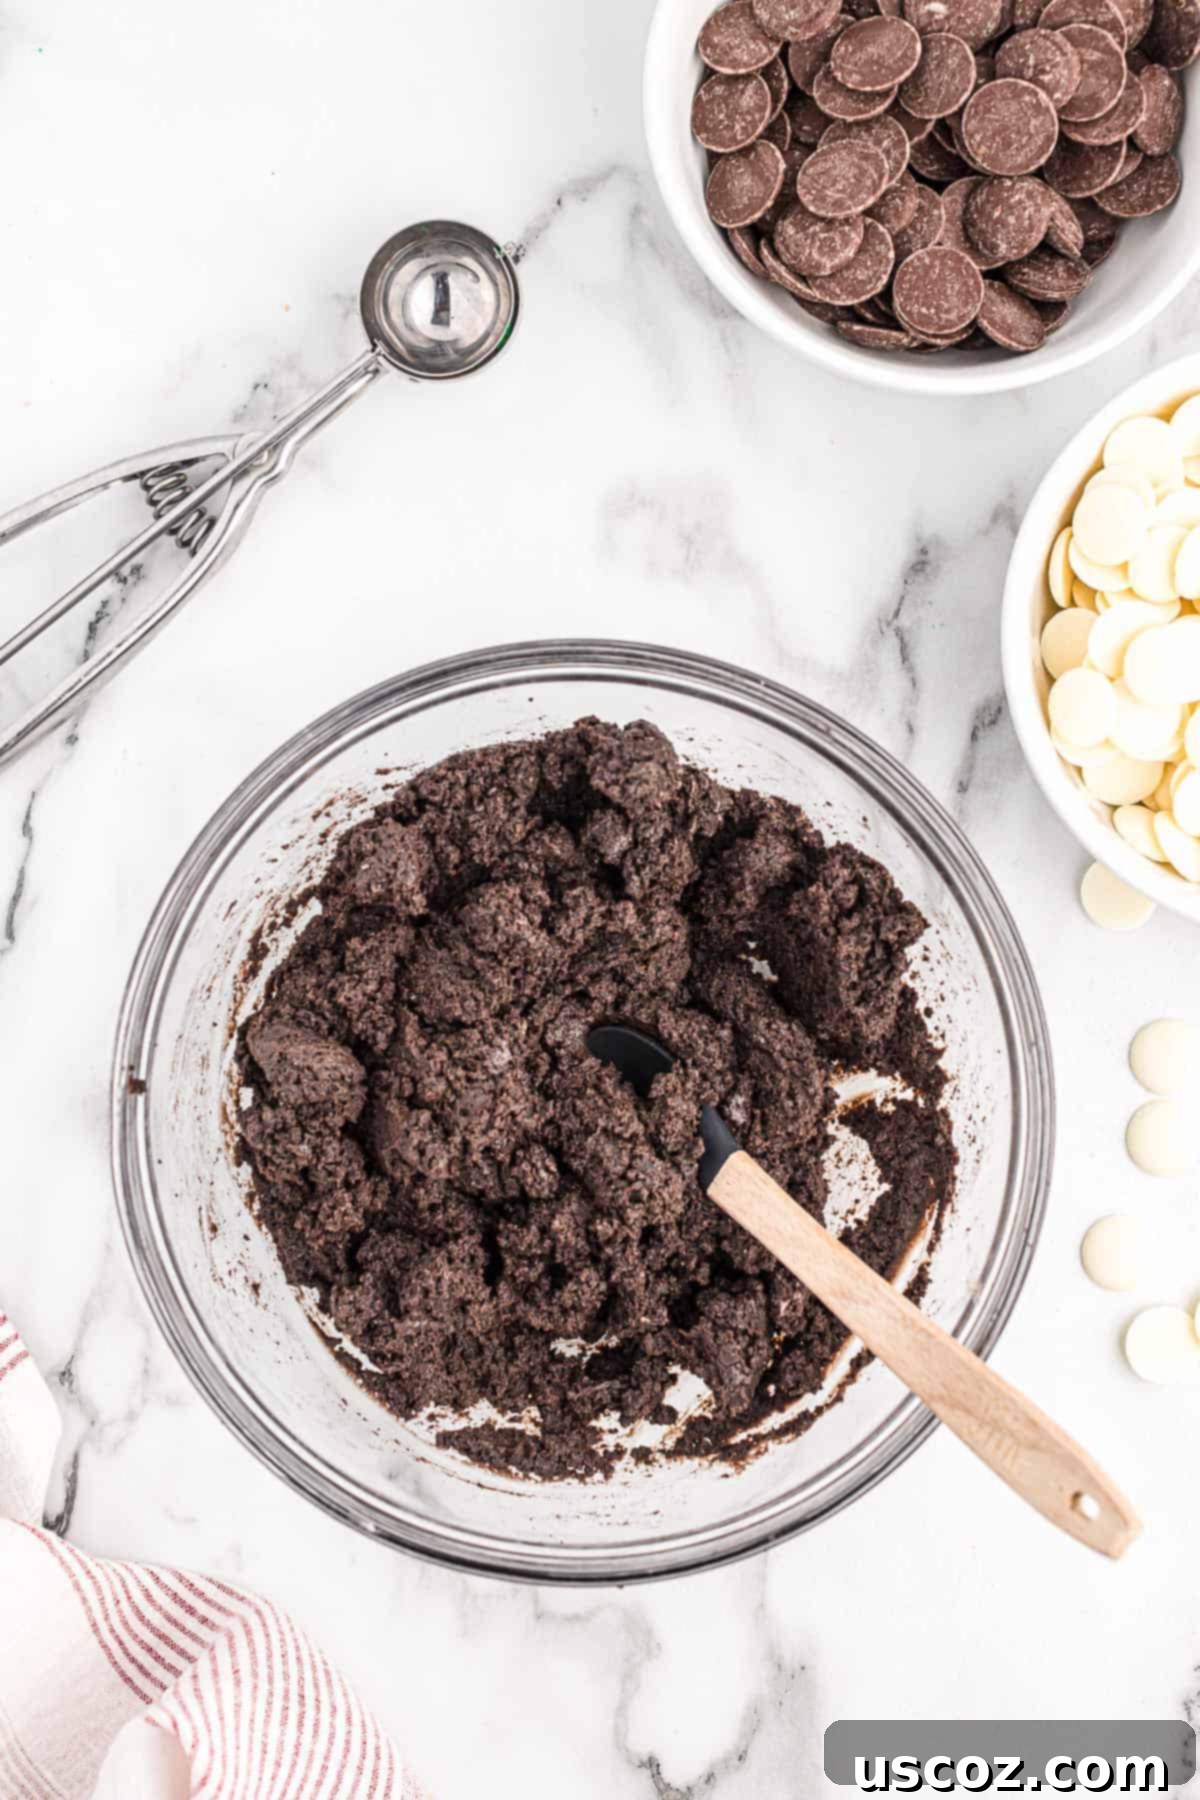
Step 3: Roll and Chill the Truffle Spheres
Line a large baking sheet with parchment paper; this will prevent the truffles from sticking and make them easy to remove later. Using a small cookie scoop (a 1-inch or 1.5-inch scoop is ideal) helps ensure uniform sizes for your Oreo balls. Scoop portions of the mixture onto the lined baking sheet. Once scooped, gently roll each portion between your palms to form perfectly smooth, circular shapes. If the mixture starts to feel too sticky on your hands, a light dusting of powdered sugar or slightly dampening your hands can help. After rolling all the balls, place the baking sheet into the refrigerator or freezer for at least one hour. This crucial chilling period allows the tr truffles to firm up significantly, making them much easier to dip in chocolate without falling apart or leaving crumbs in your coating.
Step 4: Dip in Luscious Dark Chocolate
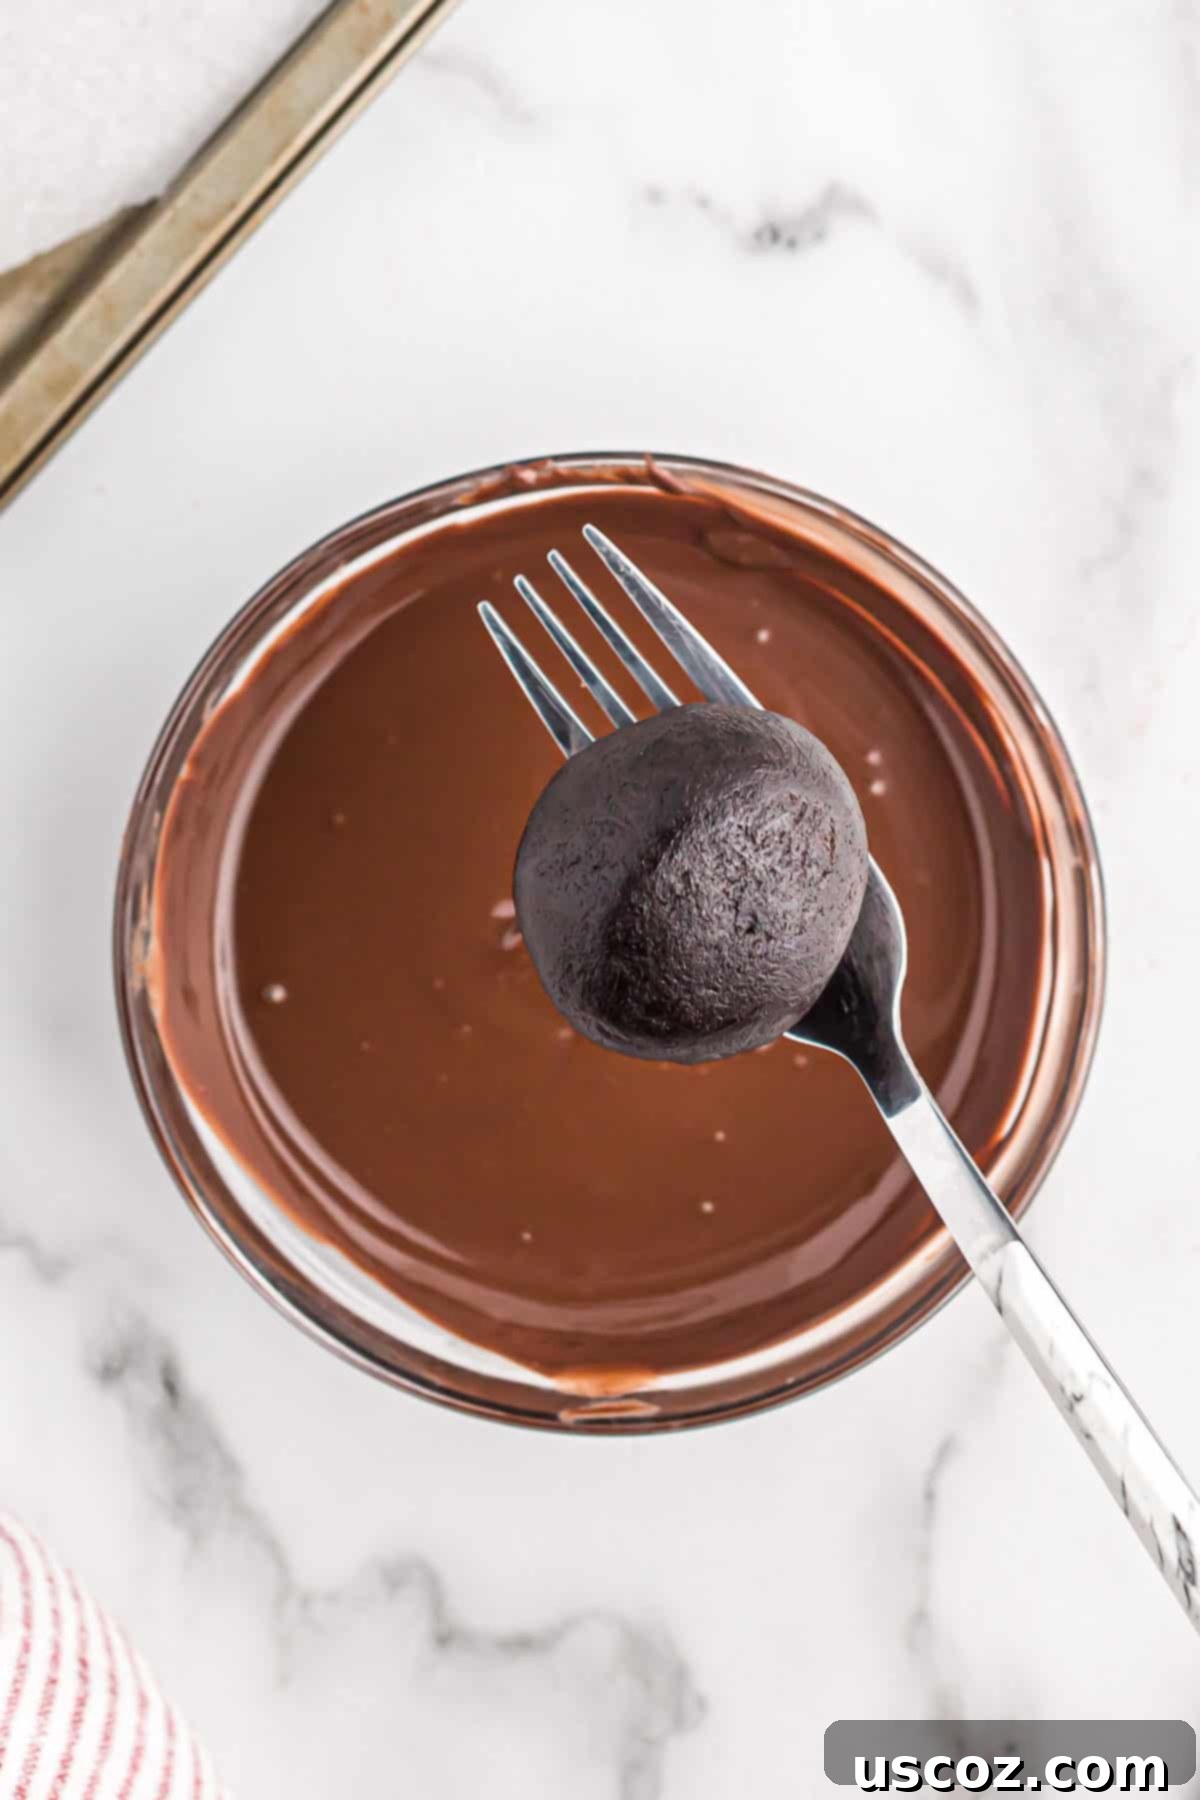
When your Oreo balls are thoroughly chilled and firm, it’s time for their decadent coating. Set aside about ¼ cup of the dark chocolate melting wafers; these will be used for drizzling later. Melt the remaining dark chocolate melting wafers. You can do this in a microwave-safe bowl in 30-second increments, stirring well after each interval, until smooth. Alternatively, use a double boiler for a more controlled melt. Stir the chocolate until it’s completely smooth, glossy, and free of any lumps.
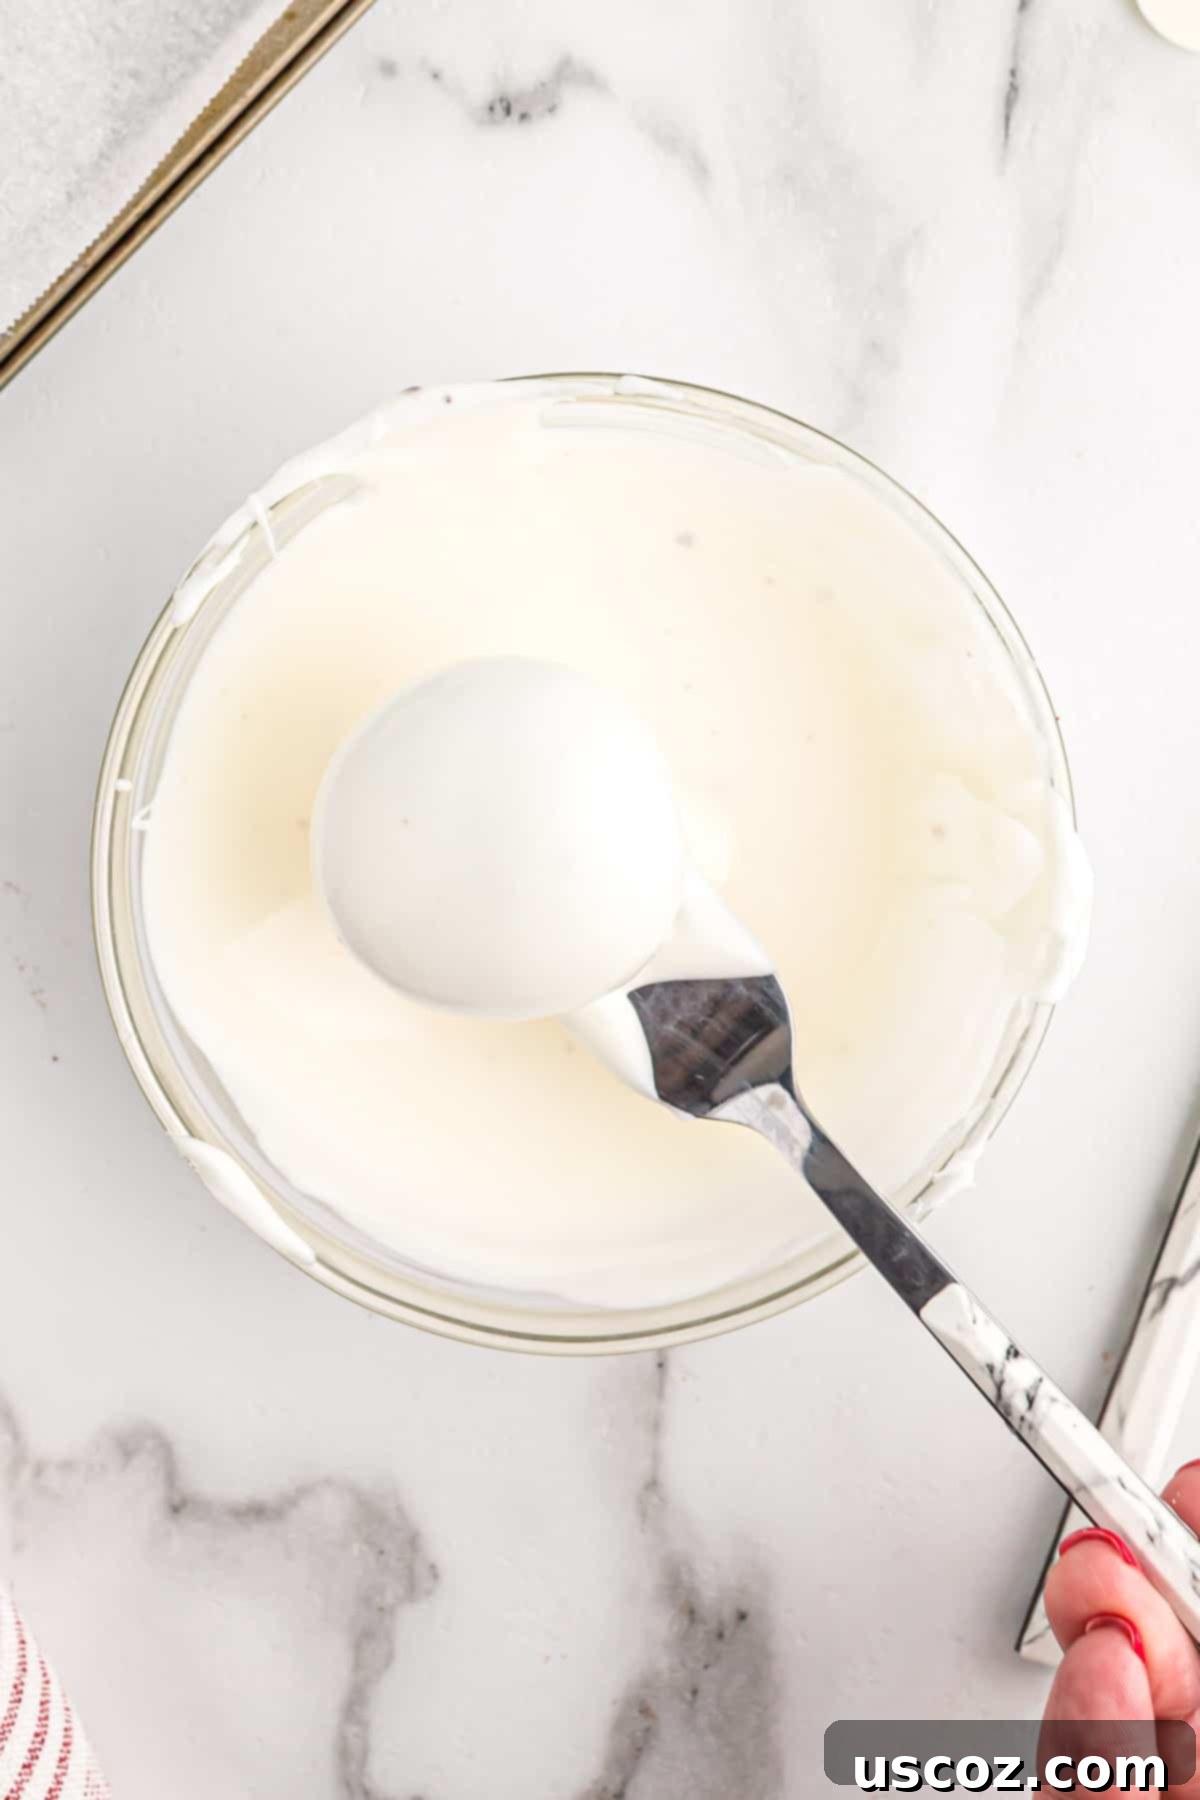
Carefully dip half of your chilled Oreo balls into the melted dark chocolate. A candy dipping tool or a fork works best for this. Ensure each ball is fully coated, then gently tap the fork against the side of the bowl to allow any excess chocolate to drip off. This step helps create a thin, even coating and prevents thick puddles of chocolate at the base. Place the dipped truffles back onto your parchment-lined baking sheet, leaving a small space between each.
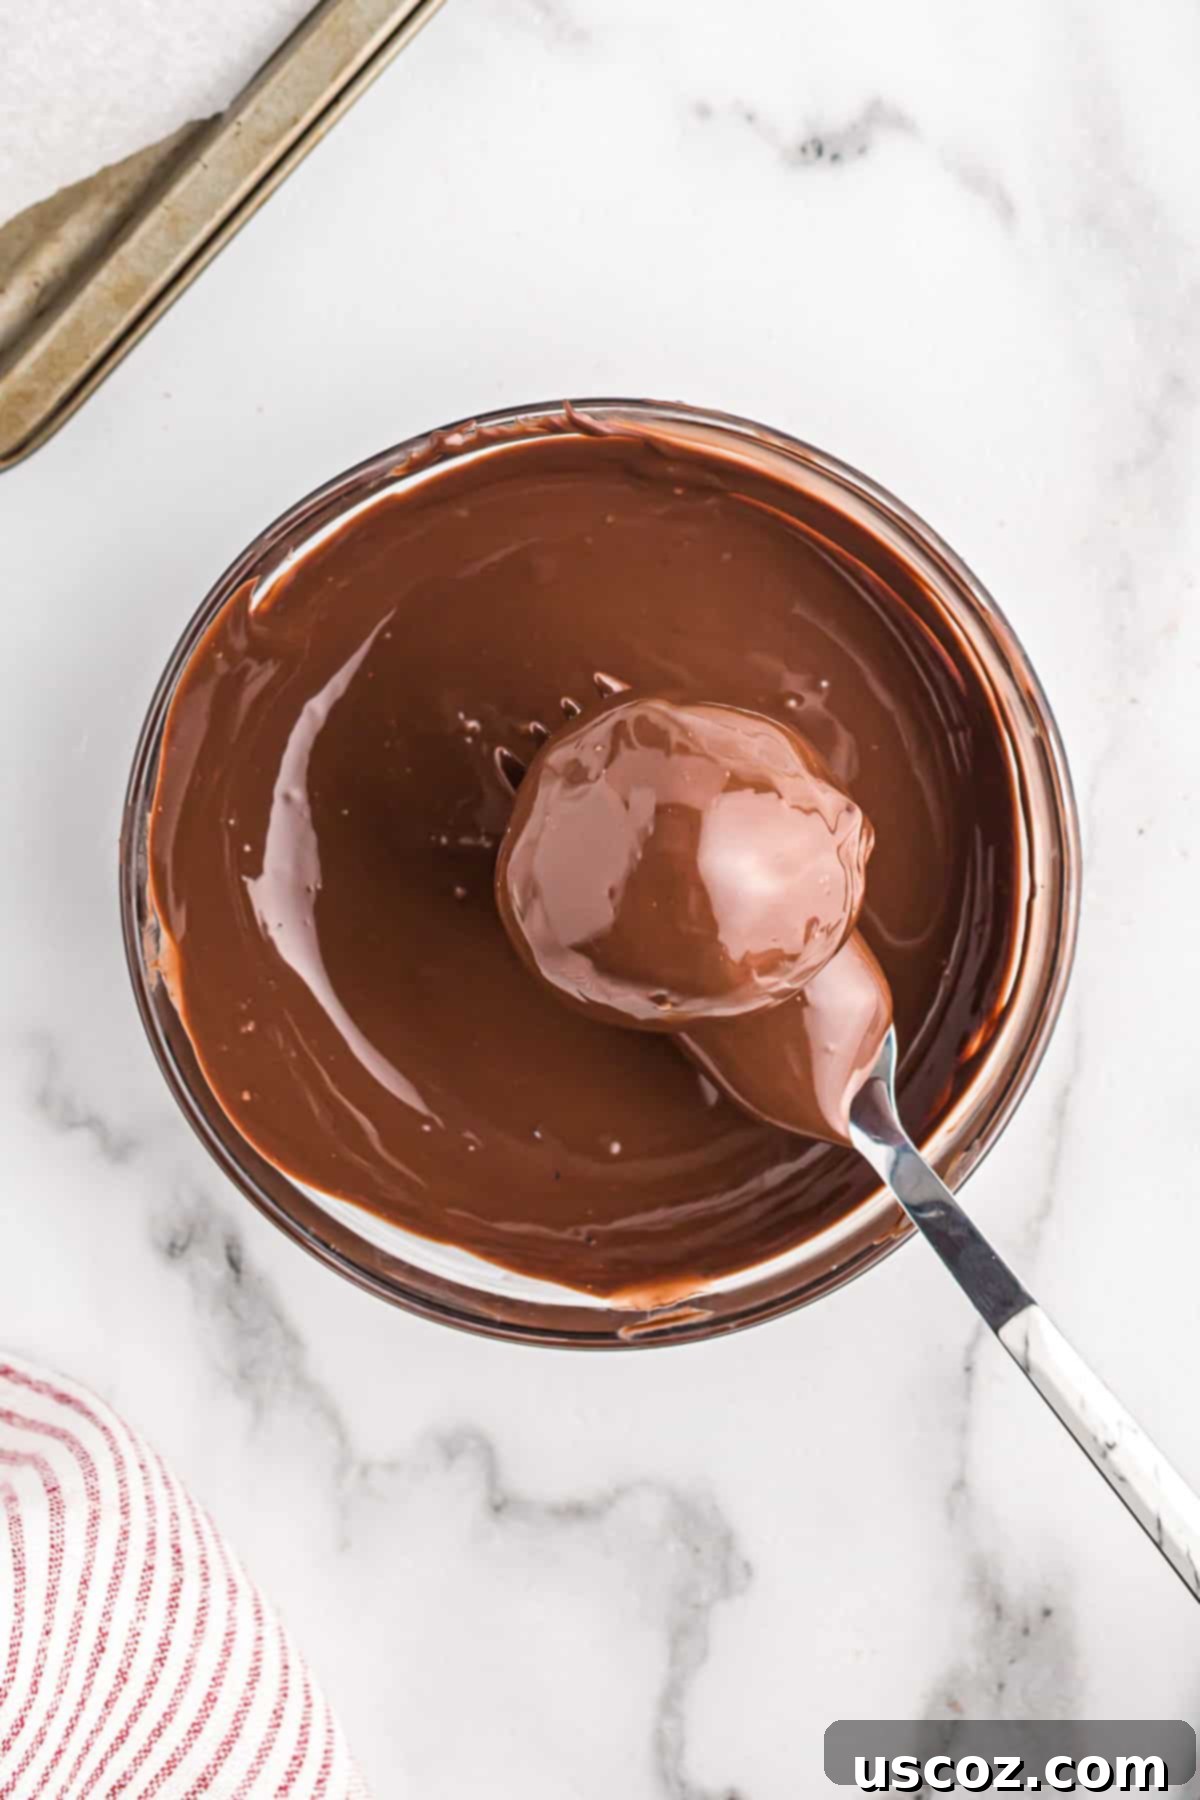
Step 5: Coat the Remaining Truffles in White Chocolate
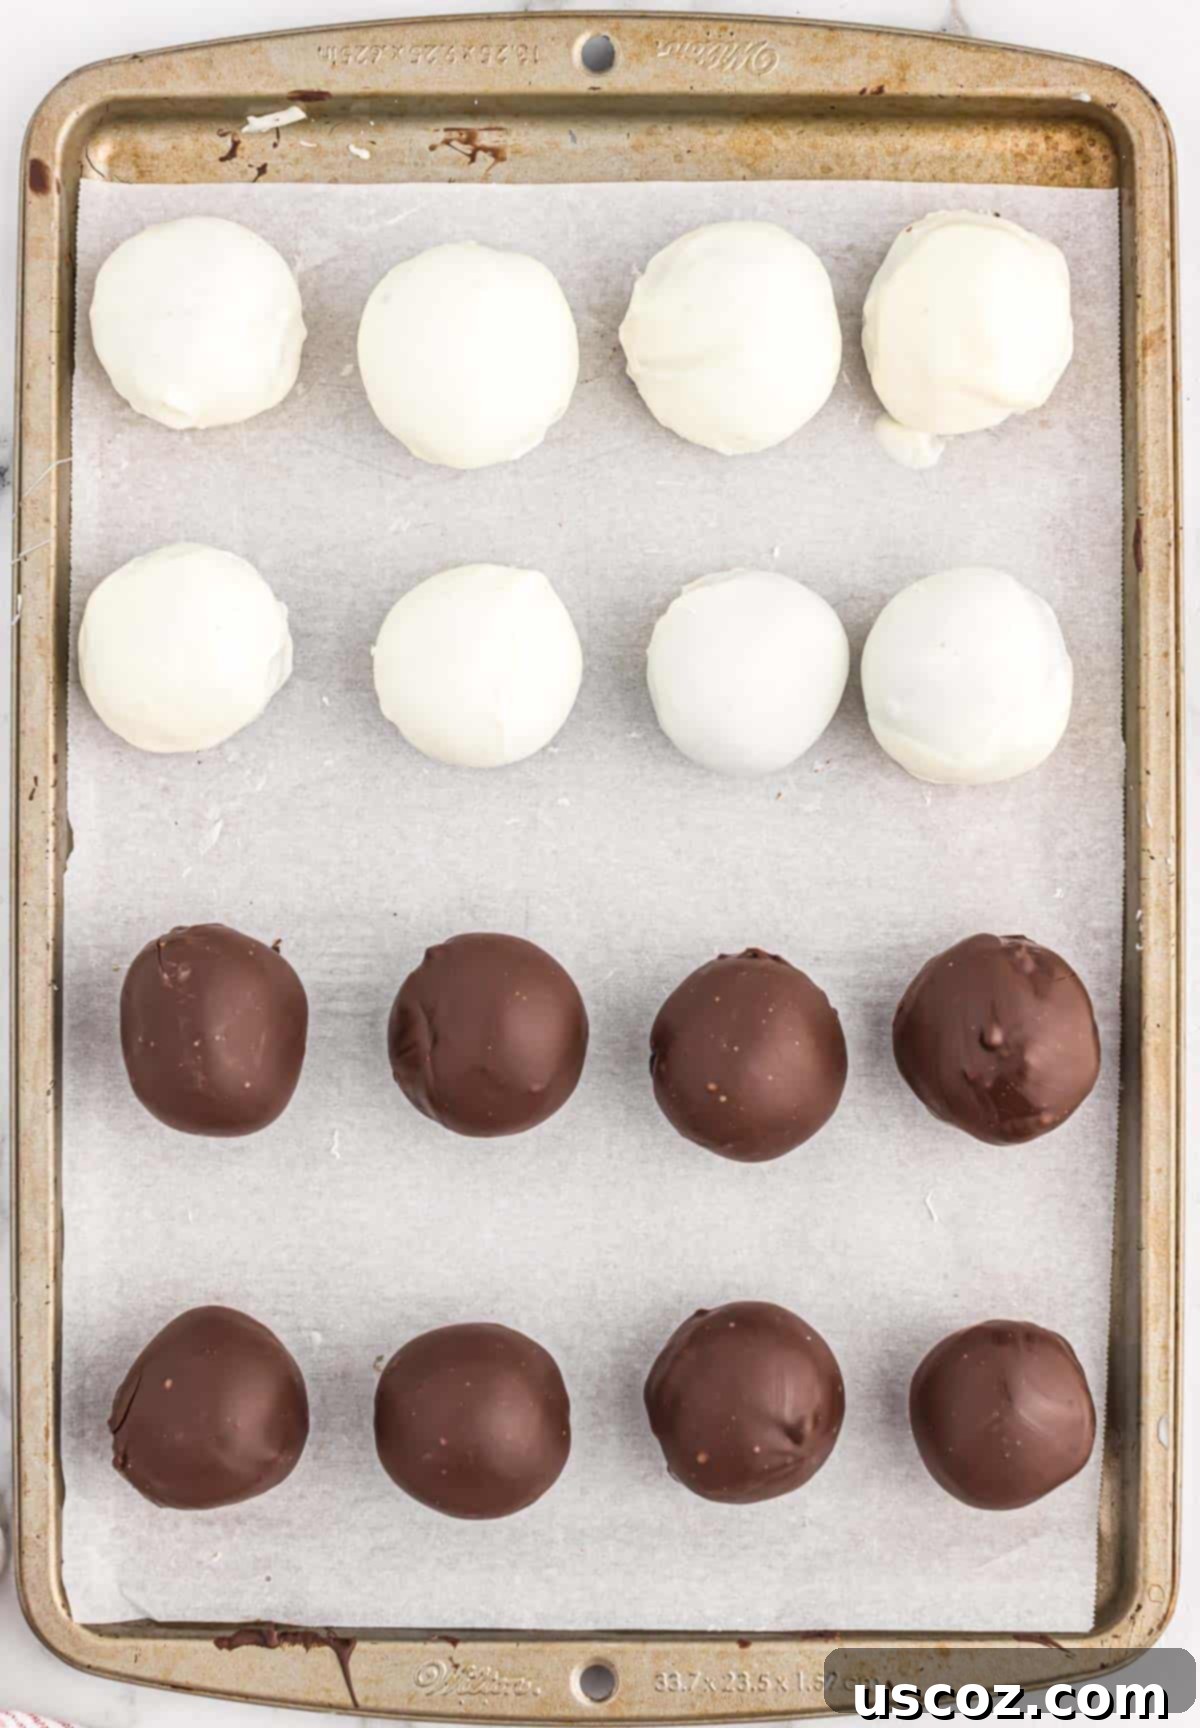
Repeat the dipping process for the remaining half of your Oreo balls, this time utilizing the white vanilla melting wafers. Just as with the dark chocolate, reserve about ¼ cup of the white wafers for later decorating. Melt the remaining vanilla melting wafers until smooth, following the same gentle method you used for the dark chocolate. Dip the remaining truffles, ensuring they are fully coated and tapping off any excess chocolate. Return these white chocolate-dipped delights to the parchment-lined baking sheet. The contrasting colors of the dark and white chocolate truffles will create an appealing display on your serving platter.
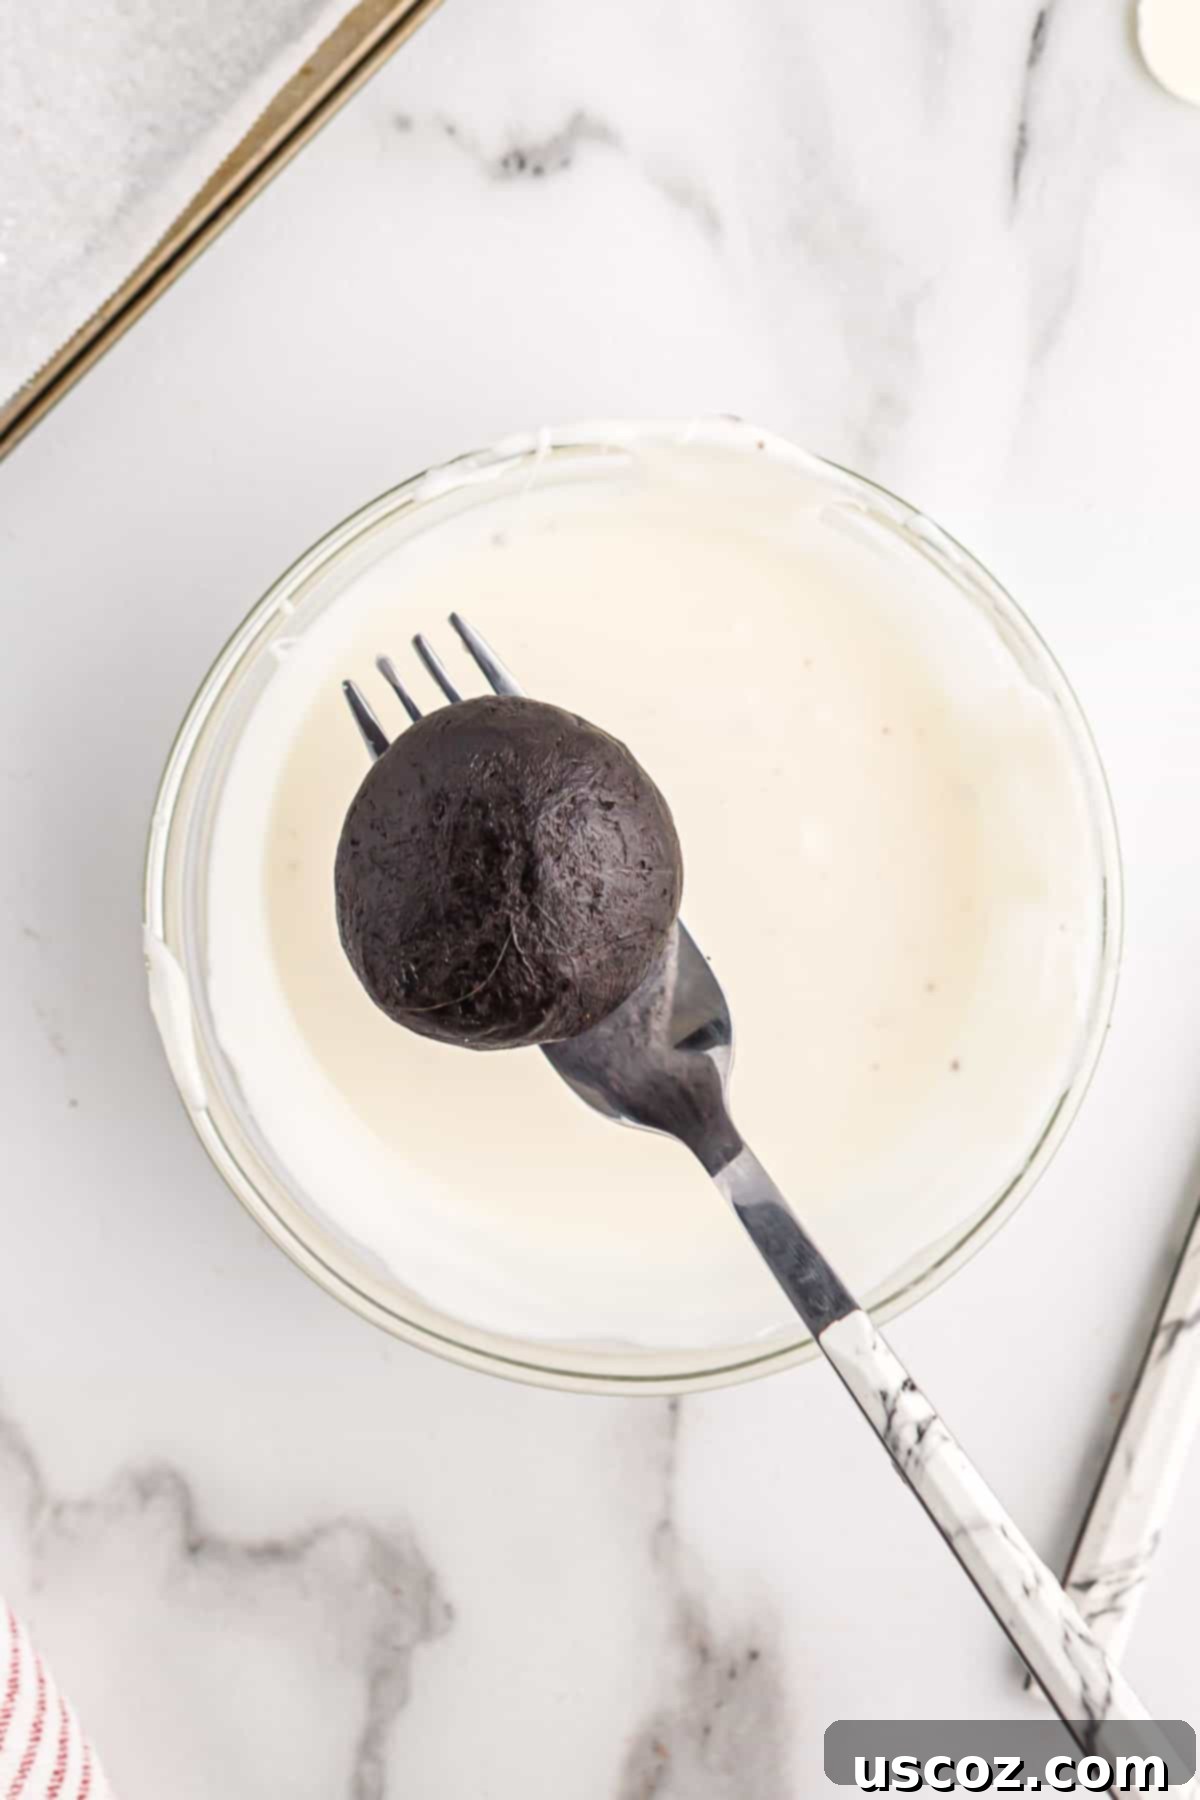
Step 6: Final Chill for a Hardened Shell
Once all your Oreo truffles have been dipped in their respective chocolate coatings, carefully place the baking sheet back into the refrigerator. Allow them to chill for a minimum of 15-30 minutes, or until the chocolate coating is completely hardened and set. This step is essential not only for achieving that satisfying “snap” when you bite into them but also for ensuring they hold their shape and remain stable at room temperature for serving. A well-chilled coating prevents them from becoming messy too quickly.
Step 7: Drizzling and Decorating (Optional but Highly Recommended!)
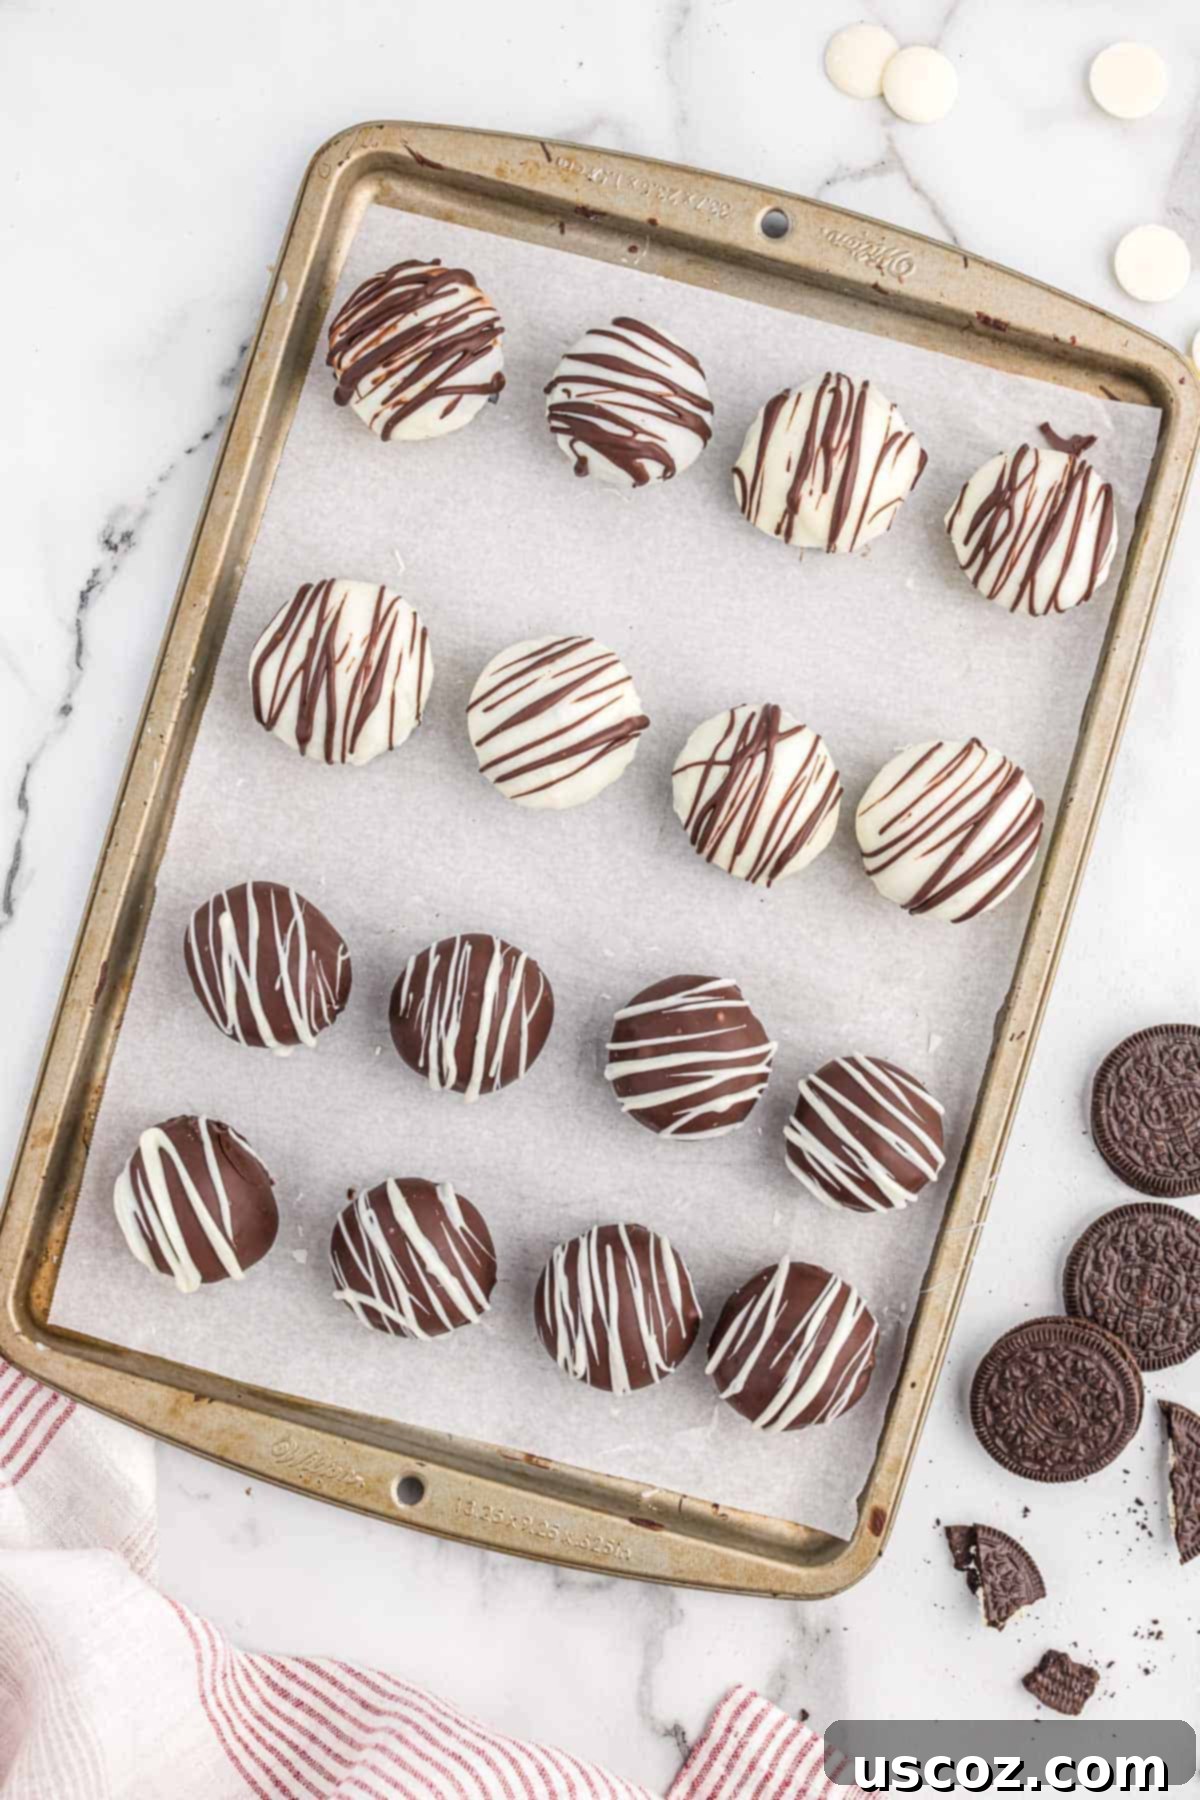
For an extra touch of visual appeal and a delicious flavor contrast, retrieve your reserved ¼ cup of dark chocolate wafers and white vanilla wafers. Melt each separately, again ensuring they are smooth and fluid. Take the melted dark chocolate and drizzle it artfully over the white chocolate-coated Oreo balls, creating beautiful contrasting stripes or zig-zags. Then, use the melted white chocolate to drizzle over the dark chocolate-coated balls. This step adds a professional finish and an additional layer of flavor. For even more flair, consider sprinkling the still-wet chocolate drizzles with extra crushed Oreos, festive sprinkles, or even a delicate pinch of flaky sea salt.
After decorating, place the balls back into the fridge for one final chill until all the drizzles are completely set. This ensures your beautiful decorations are firm and your truffles are perfectly ready to be served or gifted.
The Irresistible Appeal of Homemade Oreo Truffles
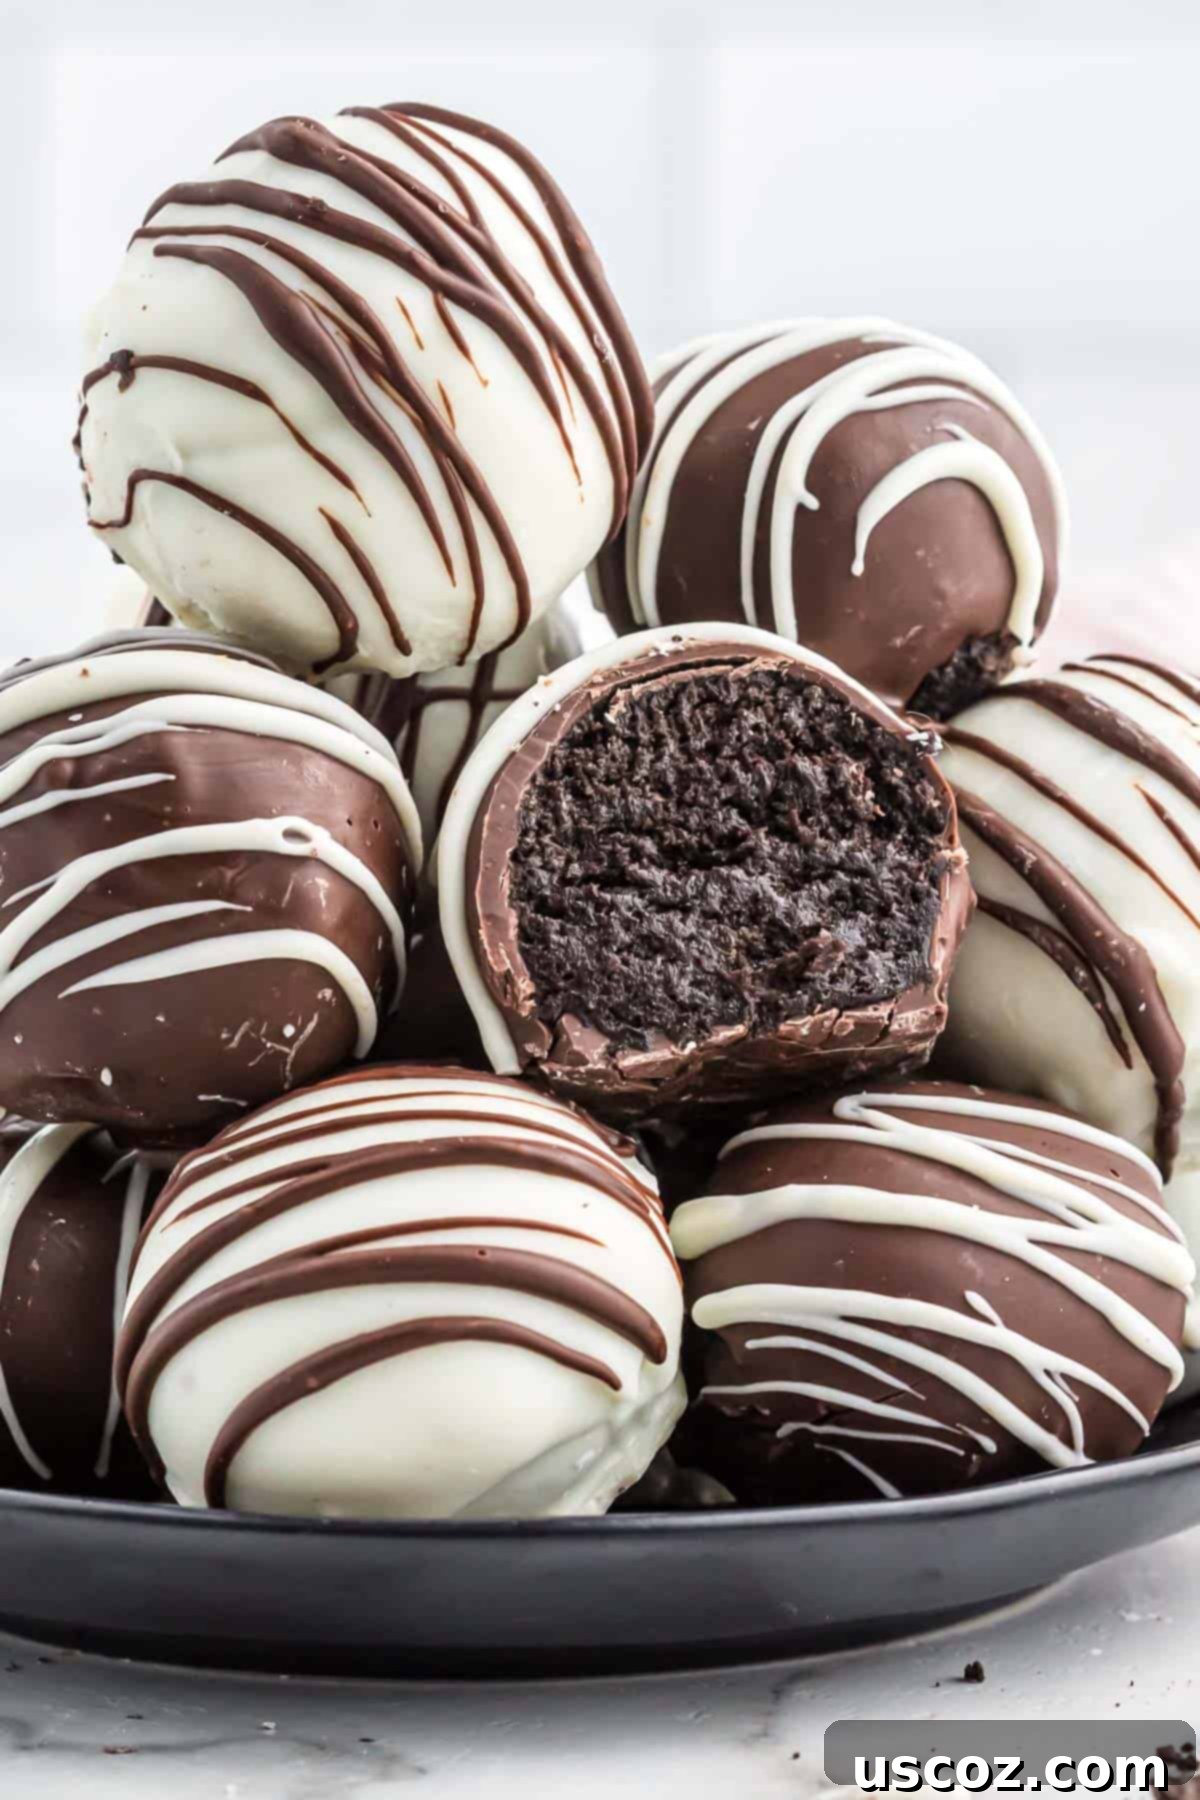
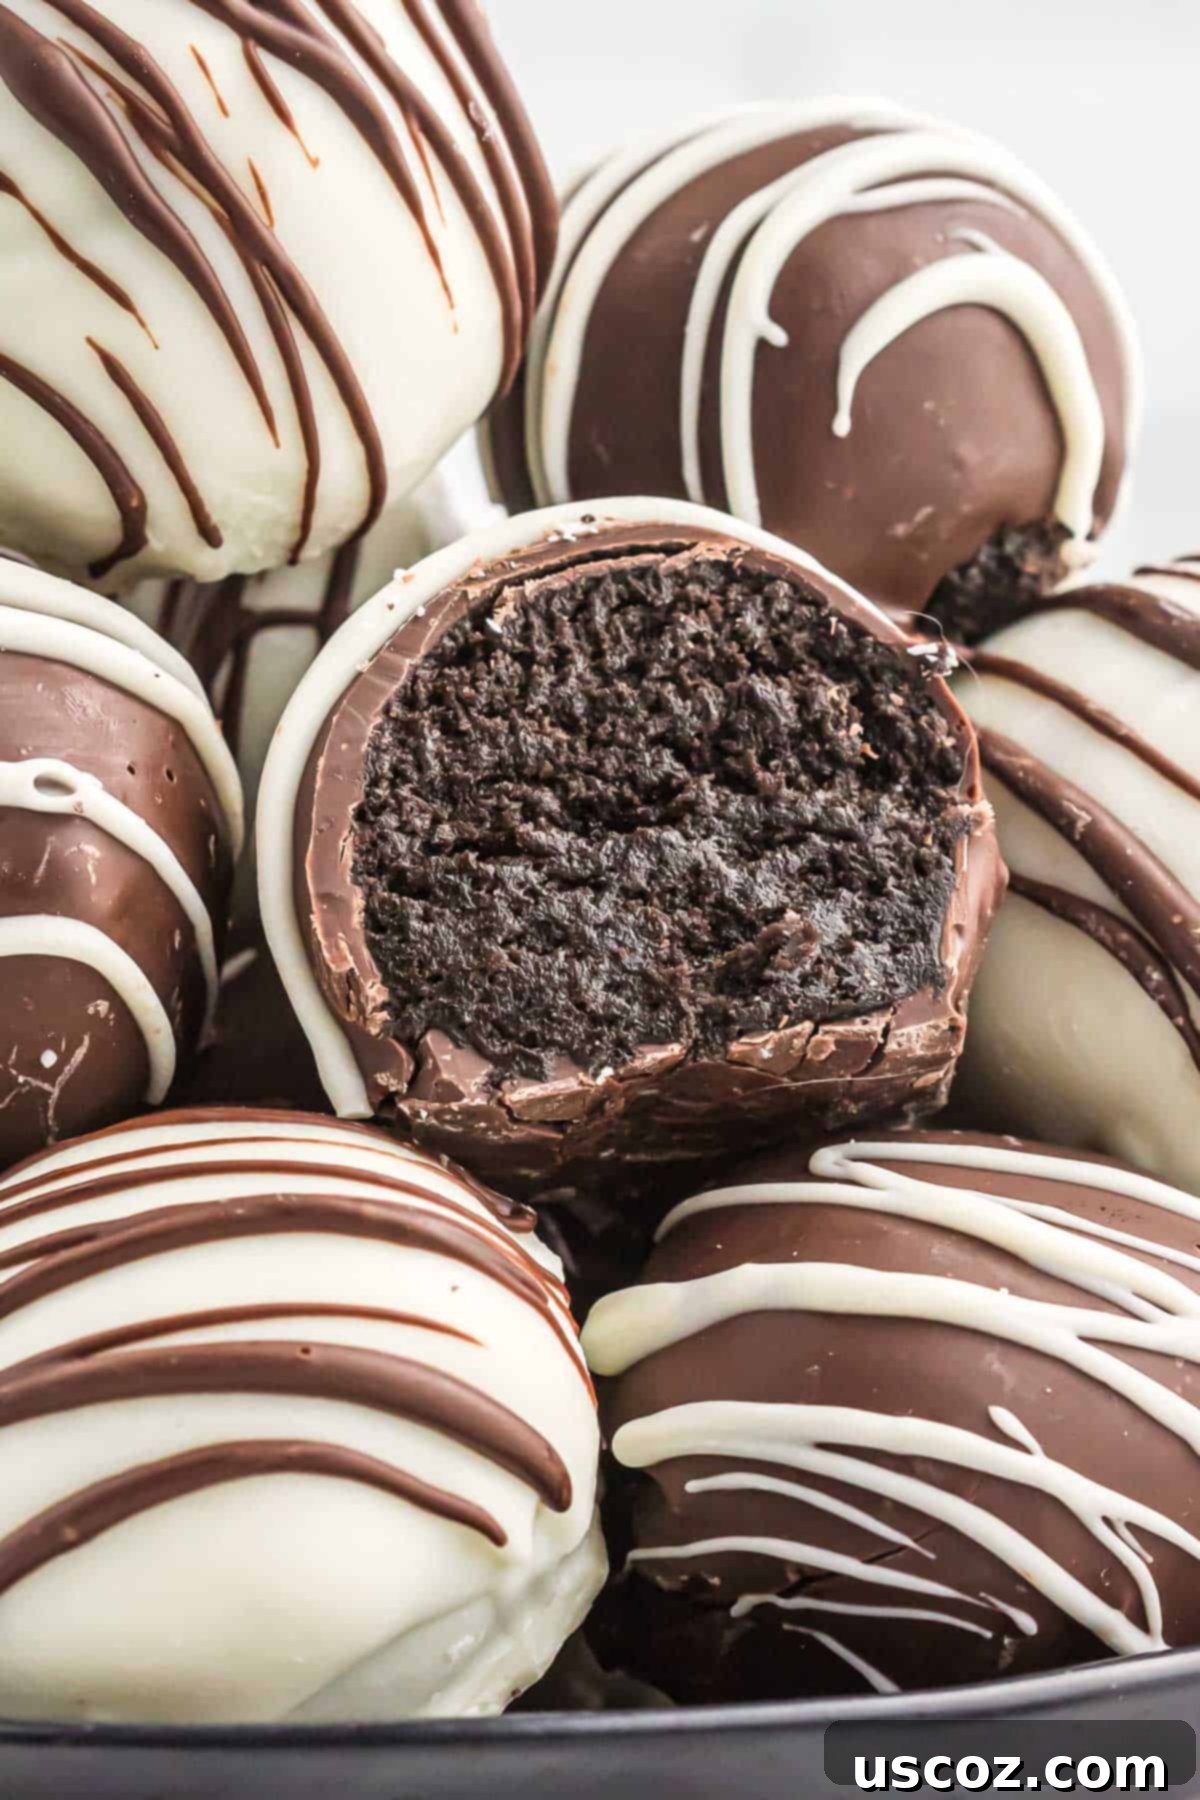
Once you’ve followed these simple steps, you’ll be rewarded with homemade Oreo truffles that are nothing short of spectacular. Each truffle is a little parcel of pure indulgence: a delightfully fudgy and rich center made from crushed Oreos and cream cheese, perfectly complemented by a crisp, snappy chocolate shell. Every bite delivers an explosion of intense chocolate flavor, with the familiar, comforting taste of Oreos shining through.
Beyond their incredible taste, these truffles are a joy to make and share. Their no-bake nature makes them accessible to cooks of all skill levels, and they’re a fantastic project for involving children in the kitchen. They are truly versatile; from a sophisticated dessert platter to a whimsical holiday treat, Oreo balls adapt effortlessly. Their customizable toppings and coatings mean you can tailor them perfectly to any theme, making them not just a dessert, but a delightful expression of creativity. They’re sure to be the star of any dessert table and disappear in record time!
Pro Tips for Success & Creative Variations
Achieve Perfection: Pro Tips for Making Oreo Balls
- Ensure Room Temperature Cream Cheese: This cannot be overstated. Soft cream cheese blends smoothly and quickly with the cookie crumbs, preventing any lumps and ensuring a uniform, easy-to-roll mixture.
- Thorough Chilling is Key: Do not rush the chilling process for the rolled balls. Firm truffles are significantly easier to dip, hold their shape better, and won’t leave crumbs in your melted chocolate.
- Quality Chocolate Matters: Using good quality melting wafers will yield a smoother, glossier, and more professional-looking coating that sets beautifully. If using regular chocolate chips, add a teaspoon of coconut oil or vegetable shortening per cup of chocolate to aid in melting and achieve a desirable dipping consistency.
- Tap Off Excess Chocolate: After dipping, gently tap the fork against the side of your melting pot or bowl. This helps remove any excess chocolate, ensuring a thin, even coating and preventing unsightly puddles at the base of your truffles.
- Utilize Dipping Tools: Specialized candy dipping tools or even a regular kitchen fork can make the dipping process much cleaner and easier, minimizing mess and ensuring an even coat.
Endless Possibilities: Creative Variations & Customizations
One of the most exciting aspects of making Oreo balls is the opportunity for endless customization. Let your creativity shine and adapt this recipe to suit any preference or occasion:
- Experiment with Oreo Flavors: Don’t limit yourself to classic Oreos! Try Mint Oreos for a refreshing twist, Peanut Butter Oreos for a nutty depth, Golden Oreos for a vanilla-forward flavor, or even seasonal varieties like Pumpkin Spice or Red Velvet for holiday themes.
- Diverse Chocolate Coatings: While dark and white chocolate are traditional, consider milk chocolate for a sweeter profile, ruby chocolate for a vibrant pink hue, or brightly colored candy melts to match party themes (think vibrant blues for baby showers or school colors for graduations).
- Exciting Internal Add-ins: Boost the flavor and texture of your truffle mixture by folding in mini chocolate chips, a tablespoon of creamy peanut butter, a dash of peppermint extract (especially with regular or mint Oreos), or a hint of orange zest for a surprising citrus note.
- Spectacular Toppings & Decorations:
- Sprinkles Galore: Use holiday-themed sprinkles (e.g., red and green for Christmas, orange and black for Halloween, hearts for Valentine’s Day) or rainbow sprinkles for birthdays and celebrations.
- Crushed Nuts: Finely chopped pecans, walnuts, or almonds can add a delightful crunch and nutty flavor when sprinkled over the wet chocolate coating.
- Crushed Candy: For an extra layer of sweetness and crunch, sprinkle with crushed candy canes during Christmas, crushed Butterfingers, or mini M&Ms.
- Flaky Sea Salt: A delicate sprinkle of flaky sea salt on dark chocolate-dipped truffles enhances the chocolate’s depth and adds a gourmet touch.
- Extra Oreo Crumbs: For the ultimate Oreo experience, roll your freshly dipped truffles in additional crushed Oreo crumbs before the chocolate sets.
- Edible Glitter or Luster Dust: For a truly glamorous and sparkly finish, lightly dust your truffles with edible glitter or luster dust.
Storage and Make-Ahead Tips for Oreo Balls
Oreo balls are not only delicious but also incredibly convenient, as they store and freeze beautifully. This makes them an ideal make-ahead dessert for parties, holidays, or simply to have a sweet treat on hand whenever a craving strikes.
- Storing Freshly Made Truffles: Once the chocolate coating has fully set, store your Oreo balls in an airtight container in the refrigerator. Layer them with parchment paper between layers to prevent sticking. They will stay fresh, fudgy, and delicious for up to 2-3 weeks.
- Freezing for Long-Term Enjoyment: These truffles are excellent candidates for freezing. After the chocolate coating is completely set, arrange the Oreo balls in a single layer in a freezer-safe airtight container. For multiple layers, place parchment paper between each layer to prevent sticking. They can be safely frozen for up to 3 months without compromising flavor or texture.
- Thawing Frozen Truffles: When you’re ready to enjoy your frozen Oreo balls, simply transfer them from the freezer to the refrigerator and let them thaw for a few hours. For a slightly softer, more immediate treat, you can let them sit at room temperature for about 15-20 minutes before serving.
- Make-Ahead Convenience: Oreo balls are a dream for entertaining! You can prepare the truffle mixture, roll the balls, and chill them several days in advance. Keep the un-dipped balls covered in an airtight container in the refrigerator. Dip and decorate them closer to your event for the freshest appearance and taste.
More Irresistible Oreo and Truffle Recipes to Explore
If these simple yet sensational Oreo truffles have captured your heart (and your taste buds!), then you’re in for a treat! We have a host of other delightful recipes that either feature the beloved Oreo cookie in creative ways or follow a similar easy, no-bake truffle-making method. Expand your dessert repertoire with some of our other favorites:
- Peanut Butter Balls with Rice Krispies: A fantastic no-bake option offering a satisfying crunch and nutty flavor.
- Pecan Pie Balls: Enjoy all the comforting, sweet flavors of a classic pecan pie transformed into a delightful bite-sized truffle.
More Oreo Recipes You’ll Love
- No Bake Oreo Pie
- Mint Oreo Truffles
- Chocolate Covered Oreos
- Oreo Dip
- White Chocolate Covered Oreos
- Oreo Spiders
Final Thoughts: Your New Go-To No-Bake Dessert
This simple yet profoundly satisfying treat truly earns its place as a go-to dessert for virtually any occasion. From casual family gatherings and last-minute potlucks to elegant holiday spreads and celebratory events, these no-bake Oreo balls consistently steal the show. Their unparalleled ease of preparation, combined with their universally loved flavor and incredibly customizable nature, makes them an indispensable addition to your recipe repertoire.
There’s no need for complicated baking techniques or extensive lists of exotic ingredients. With just a few basic items and a little chilling time, you can create a dessert that tastes gourmet but is effortlessly achievable. So, what are you waiting for? Gather your simple ingredients, follow these easy steps, and prepare a generous batch of these delightful Oreo truffles. They are guaranteed to be a spectacular hit, disappear faster than you can say “Oreo,” and leave everyone asking for the recipe!

Oreo Balls
Save RecipeSaved!
Pin Recipe
Rate Recipe
Print Recipe
Ingredients
- 36 oreos
- 8 oz cream cheese, softened
- 10 oz Ghiradelli Dark chocolate melting wafers
- 10 oz Ghiradelli White vanilla melting wafers
Instructions
-
Add the Oreos to a food processor and process into crumbs.
-
Add the softened cream cheese to the food processor and pulse to combine the truffle filling
-
Transfer the Oreo ball mixture to a bowl and use a rubber spatula to finish combining the Oreos with cream cheese
-
Line a baking sheet with parchment paper
-
Use a cookie scoop to place Oreo balls onto the baking sheet
-
Roll the balls with your hands after scooping to form a circular shape
-
Chill the Oreo balls for one hour in the fridge or freezer
-
Reserve ¼ cup of wafers and leave them in the bag, then melt the remaining dark chocolate melting wafers until smooth.
-
Dip half of the Oreo balls in dark chocolate melting wafers and place them back onto the lined baking sheet
-
Reserve ¼ cup of wafers then melt the remaining vanilla melting wafers and dip half of oreo balls in them. Place them back onto the lined baking sheet
-
Chill the oreo balls in fridge until hardened
-
Melt the remaining dark chocolate wafers and drizzle over the white chocolate oreo balls
-
Melt the remaining white chocolate wafers and drizzle over the dark chocolate oreo balls
-
Place in the fridge again until set
Nutrition
Like this recipe? Rate and comment below!
