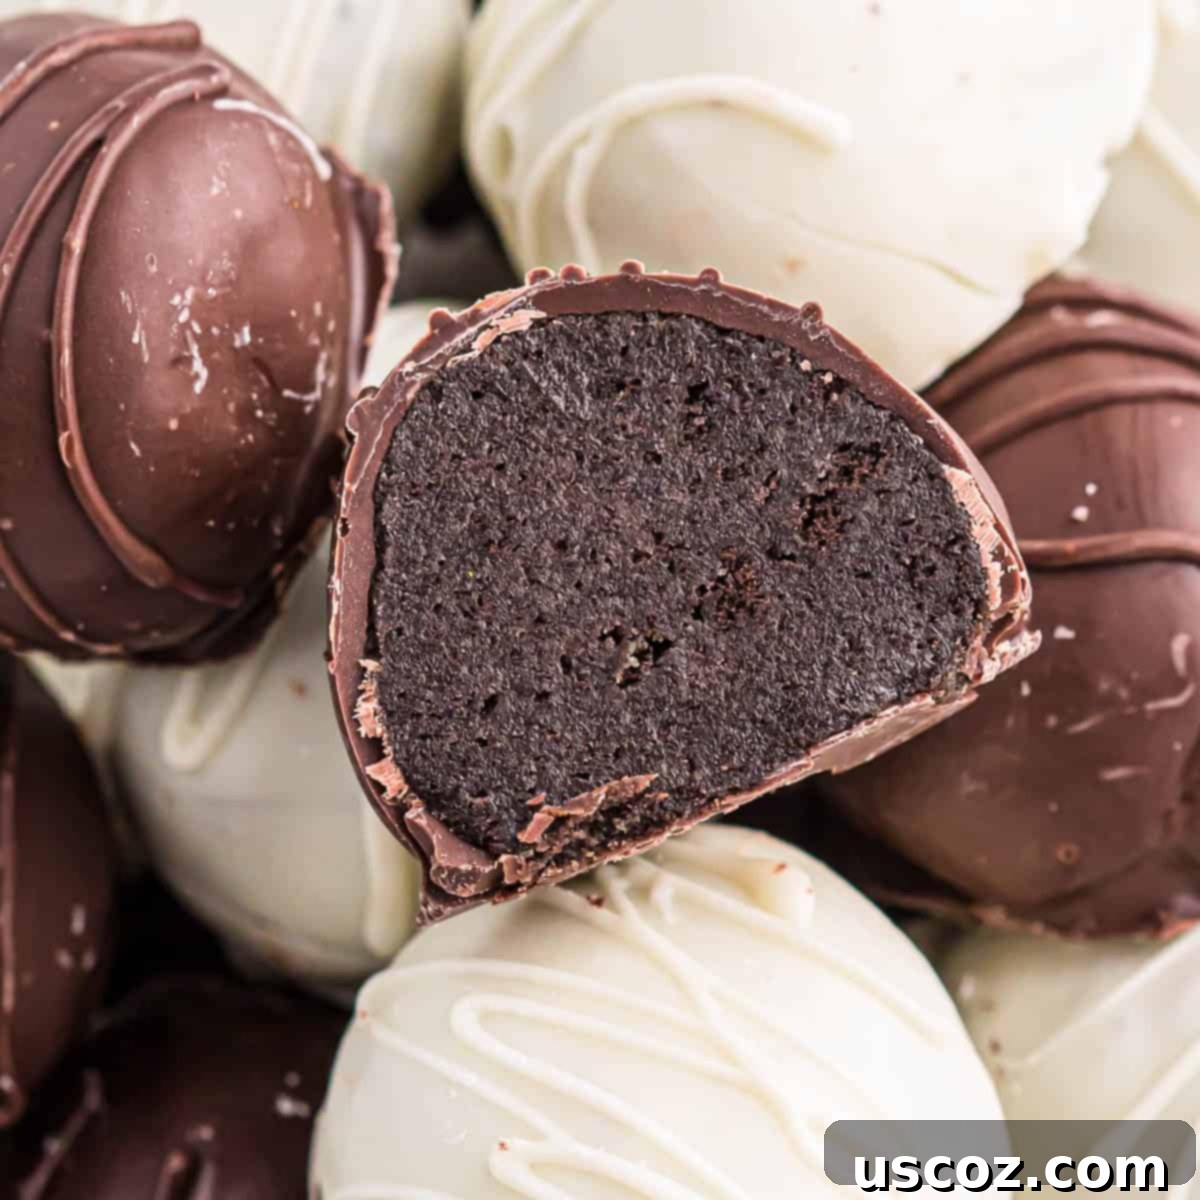
Irresistible No-Bake Mint Oreo Truffles: The Ultimate Easy Dessert Recipe
These easy Mint Oreo Truffles with cream cheese are a rich and decadent no-bake dessert made with just 4 simple ingredients! Perfect for impressing guests or satisfying a sweet craving, these delightful treats bring together the classic flavors of mint and chocolate in an incredibly convenient package.

Why You’ll Adore These Mint Oreo Balls!
Oreo balls are a timeless dessert that consistently delights, and these mint-flavored versions are no exception. They combine nostalgic cookie crunch with creamy indulgence, making them an instant favorite. Here’s why these Mint Oreo Truffles deserve a permanent spot in your recipe collection:
- Effortlessly Easy to Make: Forget complicated baking techniques and lengthy ingredient lists! These truffles are not only stunningly beautiful, but they are incredibly simple to prepare, even for the most novice baker. With minimal steps and no oven required, you can whip up a batch of these delectable treats in no time, making them ideal for spontaneous gatherings or busy schedules.
- Unforgettably Decadent Flavor: Experience the perfect harmony of cool, refreshing mint and rich, dark chocolate. These Oreo balls marry the irresistible taste of mint Oreos with the tangy creaminess of cream cheese, all enveloped in a luscious chocolate coating. Each bite offers a delightful texture contrast and an explosion of sweet, minty goodness that is truly addictive.
- Store Beautifully for Later Enjoyment: Have extra truffles? That’s hardly a problem! These delightful mint Oreo treats store exceptionally well, making them perfect for meal prepping your desserts or having a sweet emergency stash. They keep wonderfully in the refrigerator for days and can even be frozen for a few months. Simply grab one whenever a craving for something sweet strikes, and let it thaw for a few minutes.
- The Ultimate Treat for Any Celebration: Whether it’s the festive cheer of Christmas, the fresh start of New Year’s, the romantic vibes of Valentine’s Day, or even St. Patrick’s Day with their signature green hue – these Mint Oreo Truffles with cream cheese are versatile enough for any time of year! Their charming appearance and delightful flavor make them a welcome addition to holiday dessert platters, birthday parties, or simply as a special everyday indulgence.
Essential Ingredients for Mint Oreo Truffles
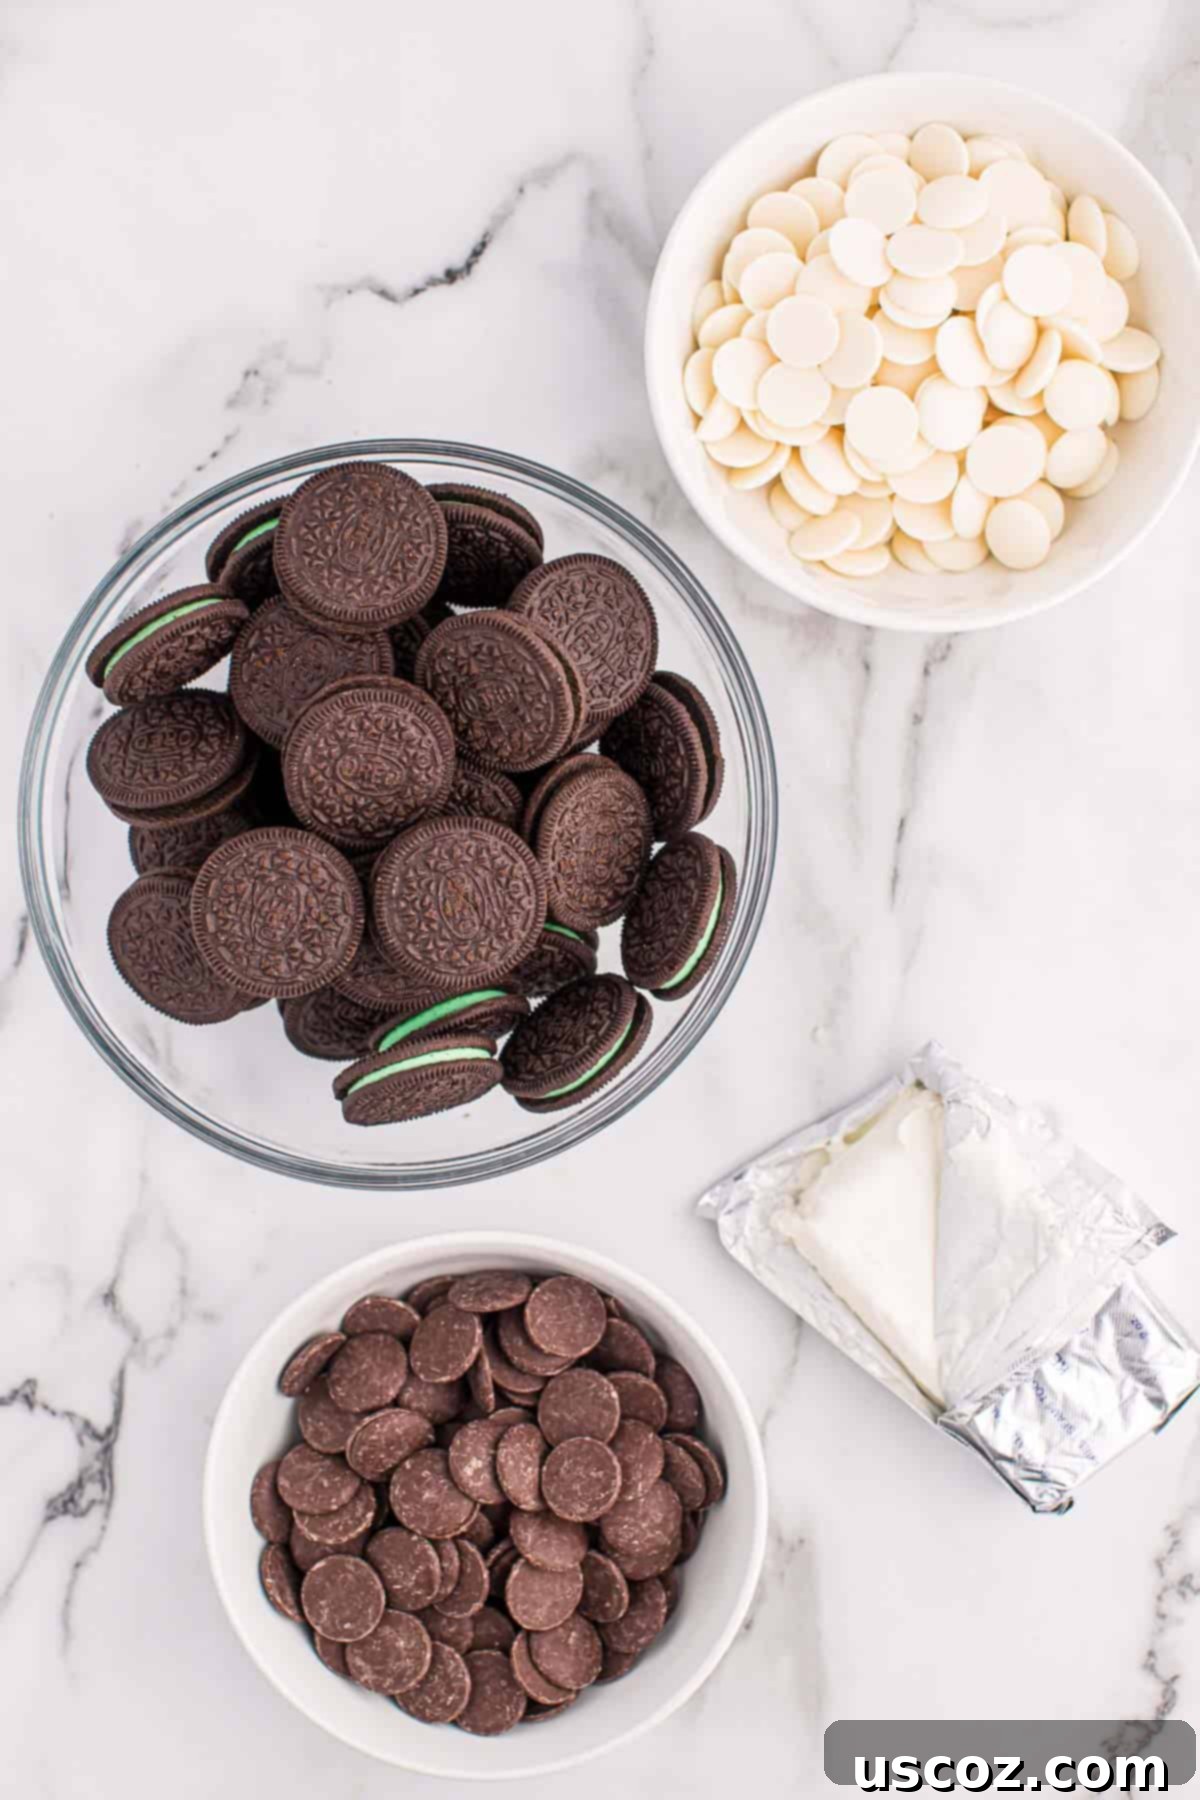
Making these glorious no-bake truffles requires just a handful of readily available ingredients. Simplicity is key to their charm and effortless preparation.
- Mint Oreos: The cornerstone of this recipe! Their distinctive mint-chocolate flavor profile is what gives these truffles their unique and refreshing taste. You’ll use both the cookie and the creamy filling.
- Cream Cheese: This acts as the essential binder, transforming the crushed Oreos into a rich, pliable dough. Ensure it’s softened to room temperature for smooth, lump-free mixing, creating that signature truffle texture.
- White Vanilla Melting Wafers: Ideal for creating a smooth, glossy, and quick-setting white chocolate coating. Wafers are specifically designed for melting and provide a professional finish without tempering.
- Dark Chocolate Melting Wafers: For a contrasting and equally delicious coating. These wafers melt beautifully and set firm, offering a rich chocolate shell that complements the minty interior perfectly.
Creative Substitutions and Delicious Additions
While the Mint Oreo Truffle recipe is perfect as is, it’s also incredibly versatile! Don’t be afraid to experiment with different flavors and textures to make these treats uniquely yours. Here are some ideas to spark your culinary creativity:
- Oreo Flavor Exploration: While this recipe celebrates mint Oreos, the world of Oreo flavors is vast and exciting! You can easily use any variety of Oreos to create different truffle experiences. Consider classic Original Oreos for a traditional flavor, Golden Oreos for a vanilla-based treat, Peanut Butter Oreos for nutty richness, or even seasonal flavors like Pumpkin Spice or Red Velvet for holiday twists. The flavor possibilities are genuinely endless, allowing you to customize your Oreo truffles for any palate or occasion.
- Chocolate Coating Alternatives: Melting wafers are fantastic for their ease of use and smooth finish, but you have other excellent options for coating your truffles. High-quality melted chocolate chips (like Ghirardelli or Guittard) or almond bark can be substituted. For a truly intense mint chocolate experience, try melting down Andes chocolate mints for the coating – this will amplify the refreshing mint flavor in every bite. When melting, always use a microwave in short bursts (30 seconds at a time) or a double boiler to prevent scorching the chocolate.
- Elevate with Toppings: Want to dress these up and add an extra layer of visual appeal and flavor? The right topping can transform your truffles. Try a dusting of colorful sprinkles for a festive look, a sprinkle of extra crushed Oreo crumbs for added texture, or finely chopped nuts like pecans or walnuts for a delightful crunch. Other ideas include a pinch of sea salt for a sophisticated sweet-and-salty contrast, a drizzle of contrasting chocolate, or even a light dusting of cocoa powder or powdered sugar for a more rustic touch.

How to Make Mint Oreo Truffles: Step-by-Step Guide
Creating these delightful Mint Oreo Truffles is a straightforward and rewarding process. Follow these simple steps for perfectly formed and deliciously coated treats every time.
Step 1: Crush the Oreos to Fine Crumbs
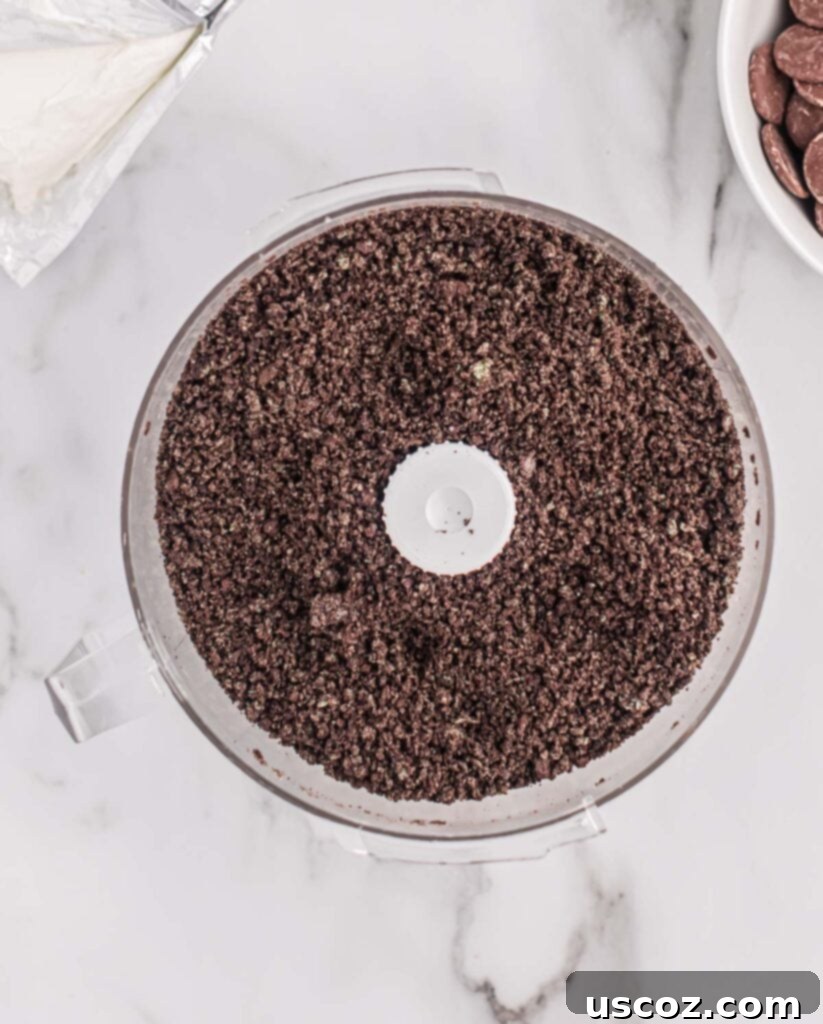
Begin by placing all your Mint Oreos (the entire cookie, including the cream filling) into a food processor. Pulse the food processor until the Oreos are transformed into fine, uniform crumbs. If you don’t have a food processor, don’t worry! You can achieve the same result by placing the Oreos in a sturdy ziploc bag and crushing them thoroughly with a rolling pin or the bottom of a heavy glass. The key is to get them as finely crushed as possible for a smooth truffle base.
Step 2: Combine with Softened Cream Cheese
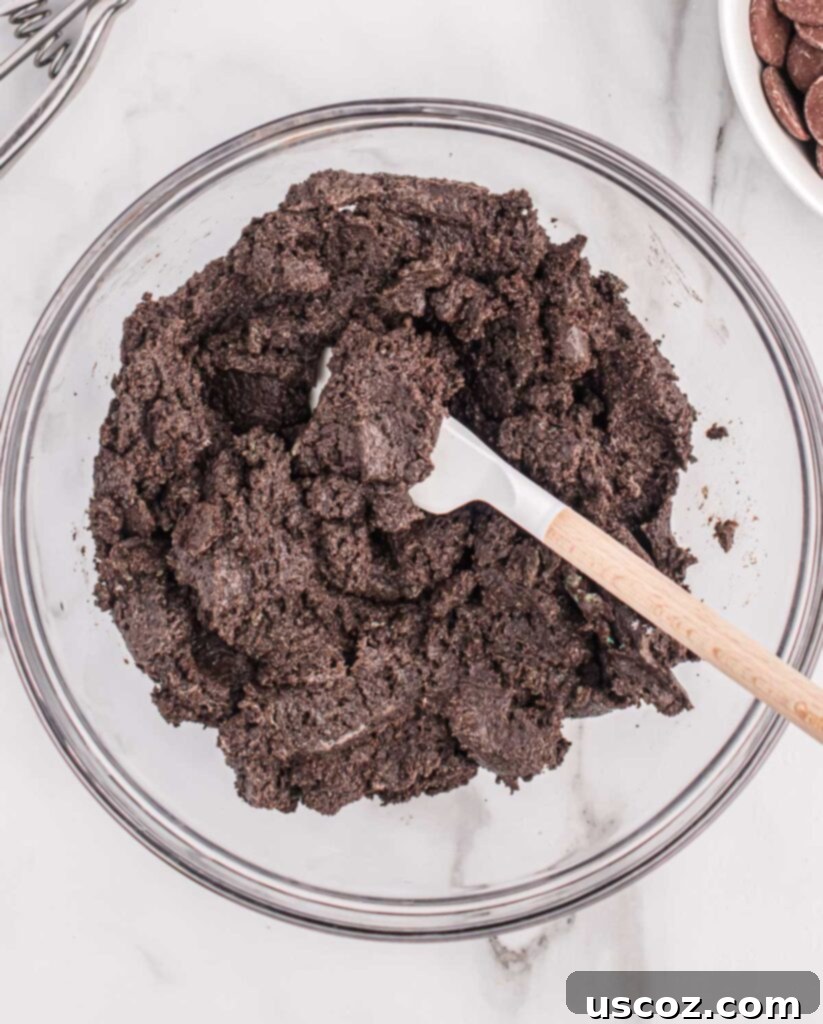
Add the softened cream cheese to the Oreo crumbs in the food processor. Pulse a few times to start incorporating the cream cheese into the Oreo mixture. The mixture will begin to clump together. Once mostly combined, remove the mixture into a large mixing bowl. Use a sturdy rubber spatula or your hands to finish mixing until the cream cheese is completely and evenly distributed, forming a uniform, dough-like consistency. It should be firm enough to roll into balls.
Step 3: Form the Truffle Balls
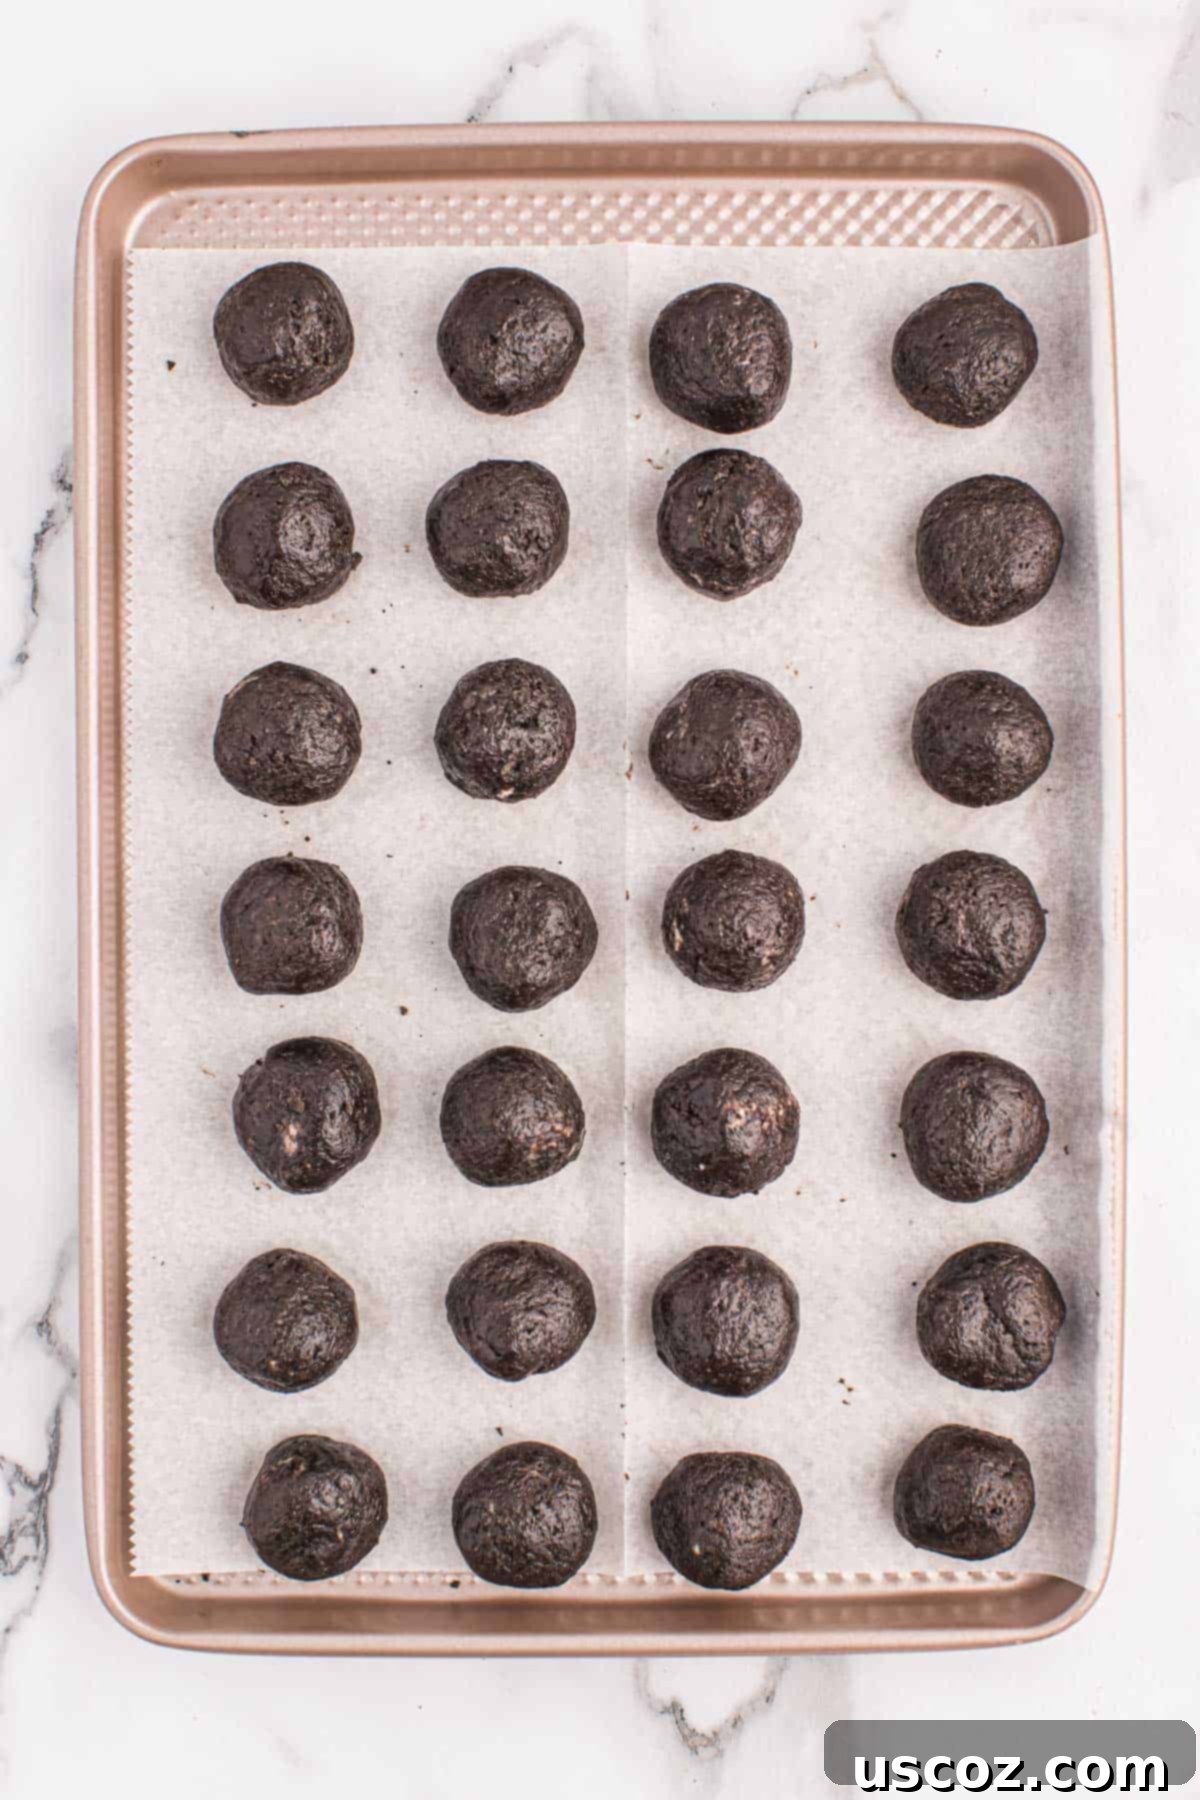
Line a baking sheet with parchment paper; this will prevent the truffles from sticking. Using a mini cookie scoop (about 1.5 tablespoons) or two spoons, portion out the Oreo mixture onto the prepared baking sheet. This recipe typically yields around 24 delicious Oreo truffles. Once portioned, gently roll each truffle with your hands to smooth out any rough edges and create perfectly round balls. Don’t worry if they’re not absolutely perfect; homemade charm is part of the appeal!
Step 4: Crucial Chilling Time
This step is absolutely vital for success! Place the formed truffles in the refrigerator or freezer to chill for at least one hour. Adequate chilling firms up the cream cheese mixture, making the truffles much easier to handle and preventing them from becoming too sticky and messy when you attempt to dip them into the melted chocolate. Don’t rush this step!
Step 5: Dip Half in Dark Chocolate
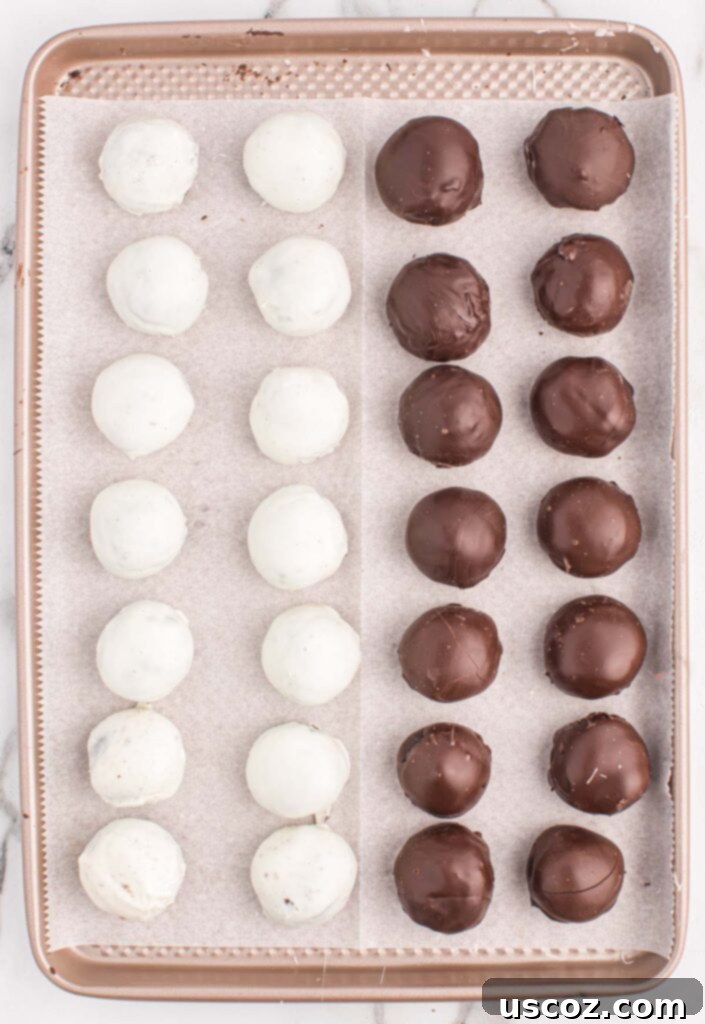
Melt the dark chocolate melting wafers according to package directions (usually in a microwave in short intervals, stirring frequently, or over a double boiler) until smooth and completely free of lumps. Take half of your chilled Oreo balls and, one by one, dip them into the melted dark chocolate. Use a fork or a dipping tool to submerge and then gently tap off any excess chocolate. Carefully place each chocolate-covered truffle back onto the parchment-lined baking sheet.
Step 6: Dip Remaining Half in White Vanilla Chocolate
Next, melt the white vanilla melting wafers using the same method as the dark chocolate until smooth. Dip the remaining half of your Oreo balls into the melted white chocolate, one by one. Again, allow any excess chocolate to drip off before placing them back onto the lined baking sheet. Once all truffles are dipped, place the baking sheet back into the refrigerator to allow both chocolate coatings to set completely. This usually takes just a few minutes, but can be longer depending on your fridge’s temperature.


Step 7: Drizzle for Decoration and Final Set
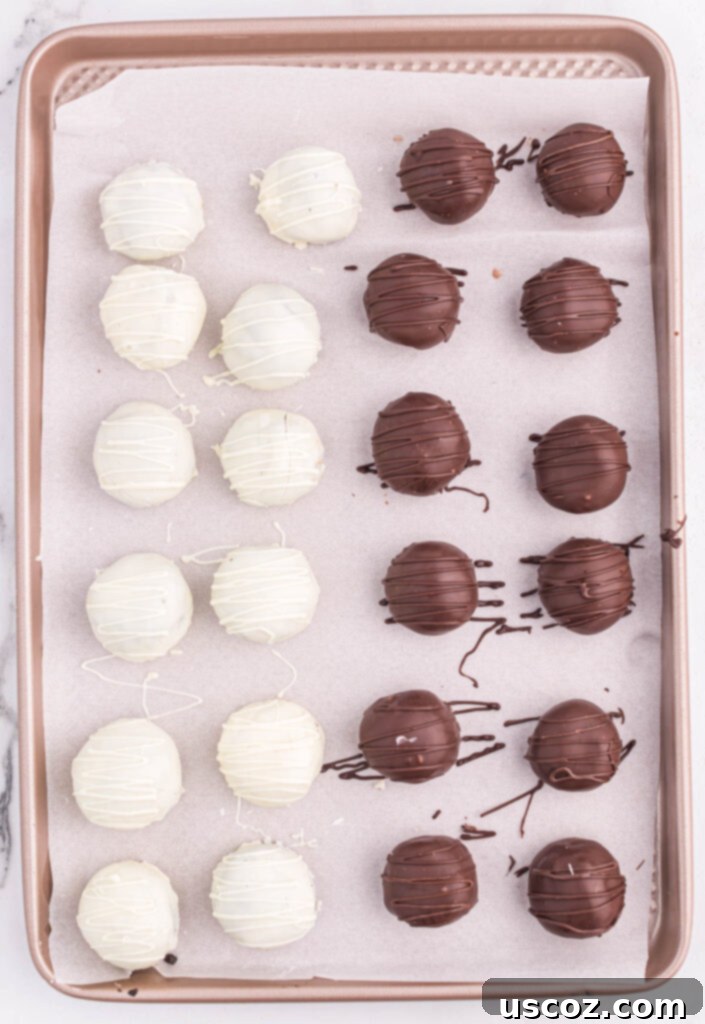
Once the chocolate coatings are set, it’s time for the final artistic touch! Drizzle any leftover melted white chocolate over the dark chocolate-covered truffles, creating an elegant contrast. Similarly, drizzle any leftover melted dark chocolate over the white chocolate-covered truffles. This adds visual appeal and an extra layer of chocolatey goodness. Immediately after drizzling, you can add sprinkles or other toppings if desired, before the chocolate sets. Place the Oreo balls back into the refrigerator one last time until all the chocolate coating, including the drizzles, is completely hardened. This typically takes about 10-15 minutes.
Expert Tips for Perfect Mint Oreo Truffles
Achieving bakery-quality truffles at home is easier than you think with these professional tips:
- Soften Cream Cheese Properly: The secret to a smooth truffle base is truly softened cream cheese. Let it sit at room temperature for at least an hour, or gently warm it in the microwave for a few seconds until it’s pliable. This prevents lumps and ensures it mixes evenly with the Oreo crumbs.
- Achieve Fine Crumbs: Whether using a food processor or a rolling pin, make sure your Oreo crumbs are as fine and uniform as possible. Larger chunks can make the truffles harder to roll and result in a less smooth texture.
- Chill Thoroughly: Do not skip or shorten the chilling time! A well-chilled truffle mixture is firm, easy to roll, and prevents the chocolate coating from melting the interior. If they feel too sticky, pop them back in the fridge or freezer for a bit longer.
- Melt Chocolate Carefully: Chocolate melting wafers are designed to melt smoothly, but even they can seize if overheated. Use low heat, stir frequently, and melt in short intervals (especially in the microwave). If your chocolate gets too thick, add a tiny bit of coconut oil or shortening (1/2 teaspoon at a time) to thin it out.
- Efficient Dipping: Use a fork, a slotted spoon, or a specialized candy dipping tool to dip your truffles. Allow excess chocolate to drip off thoroughly before placing the truffle back on parchment paper. This prevents pooling at the base and ensures a crisp, even coating.
- Decorate Quickly: If you plan to add sprinkles, chopped nuts, or other toppings, do so immediately after dipping and before the chocolate sets. This ensures the toppings adhere well to the still-wet chocolate.
- Experiment with Flavor Boosts: For an extra layer of mint flavor, you can add 1/4 to 1/2 teaspoon of pure mint extract to the cream cheese and Oreo mixture. Just be cautious not to overdo it, as mint can be potent.
Frequently Asked Questions About Oreo Truffles
Here are answers to common questions about making and enjoying these delightful Mint Oreo Truffles:
- Can I use regular Oreos instead of Mint Oreos?
Absolutely! While this recipe highlights the refreshing mint flavor, you can easily substitute classic Oreos or any other flavor you prefer. The process remains the same, just the flavor profile will change. - My truffle mixture is too sticky to roll. What should I do?
This usually means your cream cheese wasn’t softened enough or the mixture needs more chilling. Pop the bowl back into the refrigerator for another 30 minutes to an hour. A colder mixture is much easier to handle. You can also lightly dust your hands with cocoa powder if they are still a bit sticky. - How do I prevent my chocolate coating from seizing?
Seizing (when chocolate becomes thick, lumpy, and unworkable) is usually caused by overheating or introducing even a tiny bit of water. Always melt chocolate slowly over low heat, stirring constantly. If using a microwave, heat in short 15-30 second bursts, stirring well after each. Ensure all your utensils and bowls are completely dry. - Can I make these truffles ahead of time?
Yes, these are an excellent make-ahead dessert! You can prepare the Oreo balls, chill them, and dip them in chocolate a few days in advance. Store them in an airtight container in the refrigerator until you’re ready to serve. - Are these truffles gluten-free?
Not with traditional Oreos. However, many brands now offer gluten-free chocolate sandwich cookies that would work perfectly as a substitute. Just be sure to check the labels of all ingredients to ensure they are certified gluten-free. - What’s the best way to store leftover truffles?
Due to the cream cheese, these truffles must be stored in the refrigerator. Place them in an airtight container to keep them fresh and prevent them from absorbing odors from other foods. See the “Storing Oreo Balls” section for more details. - Can I use chocolate bars instead of melting wafers?
You can, but melting chocolate bars often requires tempering to achieve a smooth, shiny, and firm coating that won’t melt easily at room temperature. Melting wafers (also known as candy melts) are specifically designed to melt smoothly and set firm without the need for tempering, making them easier for home bakers.

Storing Your Mint Oreo Truffles
Proper storage ensures your delicious Mint Oreo Truffles remain fresh and enjoyable for as long as possible. Given the cream cheese content, refrigeration is key.
- At Room Temperature: Due to the cream cheese in this recipe, these truffles should only sit out for no more than two hours if you are serving them for a party. After that, they should be refrigerated to maintain freshness and food safety.
- In the Refrigerator: Store your truffles in an airtight container in the refrigerator. This will keep them fresh and delicious for up to 5 days. Ensure the container is truly airtight to prevent them from drying out or absorbing other food odors.
- In the Freezer: For longer storage, place the truffles in an airtight, freezer-safe container. They can be stored in the freezer for up to 2 months. When you’re ready to enjoy one, simply remove it from the freezer and allow it to thaw for a few minutes at room temperature before eating. This is perfect for having a sweet treat on demand!

Explore More Decadent No-Bake Desserts
If you loved the simplicity and deliciousness of these Mint Oreo Truffles, you’ll definitely want to try some of our other easy-to-make, irresistible dessert recipes. Perfect for any occasion or just a sweet treat!
- Pecan Pie Balls: A taste of classic pie in a bite-sized form.
- Peanut Butter Balls with Graham Crackers: A creamy, crunchy, and delightful classic.
- Halloween Oreo Balls: Spooktacular themed treats for your holiday party.
- Christmas Crack: The addictive, salty-sweet sensation that everyone raves about during the holidays.
- Chocolate Covered Oreos: Simple yet elegant, a chocolate lover’s dream.
- White Chocolate Covered Oreos: A delicate and sweet alternative to the classic.
- Peanut Butter Balls with Rice Krispies: Crispy, chewy, and bursting with peanut butter flavor.
- Oreo Balls for Christmas: Festive and fun variations for the holiday season.
- Chocolate Covered Almonds: A sophisticated and satisfying snack.
- Chocolate Covered Pretzels: The perfect sweet and salty combination.


Mint Oreo Truffles
Joy Shull
30
minutes
24
Save Recipe
Saved!
Pin Recipe
Rate Recipe
Print Recipe
Ingredients
-
36
mint oreos -
8
oz
cream cheese,
softened -
10
oz
dark chocolate melting wafers -
10
oz
white vanilla melting wafers
Instructions
-
Add the mint Oreos to a food processor and process them into crumbs.
-
Add the softened cream cheese to the food processor and pulse to combine the truffle filling.
-
Transfer the Oreo ball mixture to a bowl and use a rubber spatula to finish combining the Oreos with cream cheese.
-
Line a baking sheet with parchment paper.
-
Use a mini cookie scoop to place Oreo balls onto the baking sheet. You should get around 24 balls
-
Roll the balls with your hands after scooping to smooth out the edges.
-
Chill the Oreo balls for one hour in the fridge or freezer.
-
Melt the dark chocolate melting wafers until smooth.
-
Dip half of the Oreo balls in dark chocolate melting wafers one at a time and place them back onto the lined baking sheet.
-
Melt the vanilla melting wafers and dip half of Oreo balls in them one at a time. Place them back onto the lined baking sheet.
-
Chill the Oreo balls in fridge until the chocolate coating has set.
-
Drizzle the leftover melted white chocolate over the white chocolate covered truffles.
-
Drizzle the leftover melted dark chocolate over the dark chocolate covered truffles.
-
Place the truffles in the fridge again to harden until set.
Nutrition
Calories:
169
kcal
,
Carbohydrates:
20
g
,
Protein:
2
g
,
Fat:
10
g
,
Saturated Fat:
6
g
,
Polyunsaturated Fat:
1
g
,
Monounsaturated Fat:
3
g
,
Trans Fat:
0.01
g
,
Cholesterol:
10
mg
,
Sodium:
110
mg
,
Potassium:
55
mg
,
Fiber:
1
g
,
Sugar:
14
g
,
Vitamin A:
127
IU
,
Calcium:
13
mg
,
Iron:
2
mg
Like this recipe? Rate and comment below!
